Key takeaways
- Leaving it compressed: A stuff sack is for travel, not months of storage.
- Storing it damp: Even slight moisture can produce mildew and persistent odors.
- Using high heat: High temperatures can damage fabric, coatings, and insulation.
- Using harsh detergent: Bleach, softener, and strong cleaners may reduce performance.
- Hanging it by a narrow loop for months: The weight can stress one small area. A roomy sack distributes support better.
- Keeping food in the pocket: Crumbs and oils attract insects and rodents.
- Storing it in a damp basement or attic: Temperature swings and humidity are hard on insulation.
- Forcing a large bag into a small sack: Choose a container that allows the loft to remain expanded.
A sleeping bag can last for years, but only if it is stored differently from the way it is packed for a trip. The short-term stuff sack that saves space in a backpack is not a long-term storage solution. Leaving a bag compressed can flatten insulation, reduce loft, and create stubborn creases. Storing it damp or dirty can lead to mildew, odors, fabric stains, and damaged down or synthetic fill. Rodents and insects may also find food residue or exposed insulation appealing.
Learning how to store a sleeping bag properly takes less than an hour after your next outing, plus enough drying time. The basic routine is simple: clean the bag according to its care label, dry it completely, store it loosely in a cool and dry place, and inspect it occasionally. This method works for down and synthetic sleeping bags, whether you use them every weekend or only a few times a year. Here is a practical 2026 routine that protects warmth without requiring specialized equipment.
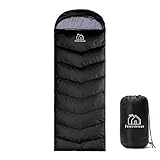
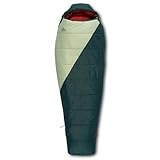
Our top picks

As an Amazon Associate we earn from qualifying purchases at no extra cost to you. Ratings are shown as listed on Amazon.
What You Need
| Item | Why | Optional? |
|---|---|---|
| Large breathable storage sack | Lets insulation remain lofty instead of compressed. A mesh or cotton sack is preferable to a small travel stuff sack. | No for long-term storage; a clean pillowcase can work temporarily. |
| Sleeping bag care-label instructions | Confirms whether the bag can be machine-washed, what water temperature to use, and how it should be dried. | No |
| Mild technical or down-safe detergent | Removes body oils and dirt without leaving heavy residue that can affect insulation. | Only if the bag needs washing. |
| Large-capacity washer or bathtub | Provides room for the bag to move freely during cleaning. A cramped washer can stress seams and baffles. | Yes; hand-cleaning may be possible. |
| Dryer on low heat or a well-ventilated drying area | Ensures the insulation is fully dry before storage. | No, although the best method depends on the care label. |
| Storage shelf or closet | Keeps the bag away from basement floors, roof leaks, direct sunlight, and pests. | No |
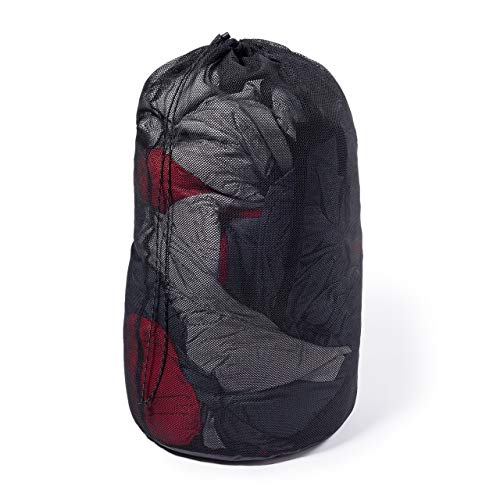
| Optional storage sack: OmniCore Designs 110L Poly Mesh Sleeping Bag Storage Sack, about $15 | The 110-liter capacity provides substantially more room than a compact stuff sack, while mesh allows airflow. | Yes; confirm that the opening accommodates your bag. |
| Optional stuff sack: Stansport 870 Stuff Bag, 18" L x 30" W, Blue, about $10 | Useful for transport or short-term organization when its size suits the packed bag. | Yes for storage; do not use a tightly compressed travel sack for months at a time. |
Step-by-Step
1. Remove the bag from its travel sack (2 minutes)
Take the sleeping bag out as soon as practical after returning from a trip. Do not leave it compressed in a car, closet, or backpack for several days. Open the zipper and shake the bag gently to separate folds. Check the footbox, hood, collar, and pockets for clothing, wrappers, dirt, or other debris.
Turn the bag inside out only if the care instructions allow it and doing so will not strain the zipper. Avoid pulling hard on loose threads or forcing a snagged zipper. If the bag is wet, move directly to the drying step rather than sealing it in any container.
2. Inspect and spot-clean it (5 to 10 minutes)
Look for stains, food residue, body oils around the collar, broken snaps, open seams, and missing zipper teeth. Brush away dry dirt with a soft-bristled brush. For a small mark, use a damp cloth and a small amount of mild soap or the cleaner recommended by the manufacturer. Dab rather than scrub, and rinse away residue with a clean, damp cloth.
Do not use bleach, fabric softener, or ordinary detergent unless the care label specifically permits it. These products can leave residue or affect water-repellent treatments. A heavily soiled bag should be washed before storage; a lightly used bag may only need spot-cleaning.
3. Wash only when necessary and according to the label (30 to 45 minutes)
Frequent washing can wear fabric and insulation, so clean the bag when it is visibly dirty, smells persistently unpleasant, or has accumulated significant body oils. Check the manufacturer’s instructions first. Many sleeping bags require a large front-loading washer because a standard top-loader with a central agitator can catch or stress the shell.
Use cool or lukewarm water and a small amount of appropriate cleaner. Run an extra rinse if any soap remains. For down, use a down-specific cleaner; for synthetic fill, use the product specified on the care label. If your home equipment is too small, a professional cleaner experienced with technical outdoor gear is safer than forcing the bag into a cramped machine.
4. Dry it completely (several hours to 24 hours)
Drying is the most important storage step. A bag that feels dry on the outside may still hold moisture in its baffles or footbox. If the care label permits machine drying, use low heat and check the bag every 20 to 30 minutes. Remove it carefully, shake it gently, and redistribute clumps. Dryer balls may help separate down, but use them only if the manufacturer allows them.
Do not use high heat, which can damage shell fabric, coatings, or synthetic fibers. If air-drying, lay the bag flat or drape it over a broad, clean surface in a shaded, well-ventilated area. Avoid direct, prolonged sunlight. Turn or reposition it periodically. Depending on humidity and fill, air-drying can take a full day. Never store the bag until there is no cool, damp feeling inside the insulation.
5. Air it out before packing (30 minutes to 2 hours)
Once dry, leave the bag fully unzipped in a clean, dry room. This gives trapped odors a chance to dissipate and makes it easier to find damp spots or missed debris. Down bags may smell slightly when damp, but a strong or sour odor after drying can indicate residual moisture or a cleaning problem.
6. Store it loose and uncompressed (5 minutes)
Place the bag loosely in a breathable storage sack. Do not roll it tightly or push it into a small stuff sack for long-term storage. With a mesh sack such as the approximately $15 OmniCore Designs 110L model, insert the foot end first and let the insulation settle naturally. Do not force the bag into the sack if it is packed tightly; a larger container is better.
A compact sack such as the approximately $10 Stansport 870, listed at 18 inches long by 30 inches wide, may be convenient for transport, but use it for home storage only if the bag remains genuinely loose. For many bags, a large breathable sack or clean cotton pillowcase is a better choice.
7. Choose the right storage location (5 minutes)
Keep the bag on a shelf in a dry, temperature-stable closet. A storage area around 50 to 75 degrees Fahrenheit is generally comfortable for household gear, but avoiding moisture matters more than hitting an exact temperature. Keep the bag above the floor and away from plumbing, exterior walls with condensation, direct sunlight, heaters, and sharp objects.
Do not store it in a sealed plastic bin unless the bag is inside a breathable inner sack and the environment is reliably dry. Plastic can trap condensation. If pests are a concern, use a clean, rigid outer container with ventilation or place the breathable sack inside a pest-resistant storage area.
Mistakes to Avoid
- Leaving it compressed: A stuff sack is for travel, not months of storage.
- Storing it damp: Even slight moisture can produce mildew and persistent odors.
- Using high heat: High temperatures can damage fabric, coatings, and insulation.
- Using harsh detergent: Bleach, softener, and strong cleaners may reduce performance.
- Hanging it by a narrow loop for months: The weight can stress one small area. A roomy sack distributes support better.
- Keeping food in the pocket: Crumbs and oils attract insects and rodents.
- Storing it in a damp basement or attic: Temperature swings and humidity are hard on insulation.
- Forcing a large bag into a small sack: Choose a container that allows the loft to remain expanded.
How Often
Air out the bag after every trip and inspect it before storing. Spot-clean small marks as needed. Wash it when it is dirty or noticeably odorous rather than on a rigid calendar. For occasional camping, a thorough cleaning once every few seasons may be enough; frequent users may need cleaning once or twice a year. Check the storage sack every one to three months for dampness, pests, or compression. Re-fluff the bag by removing it, shaking it gently, and returning it loosely to storage.
When to Call a Pro or Replace
Contact an outdoor-gear repair or cleaning specialist if the bag has extensive mildew, a torn baffle, leaking down, a damaged waterproof shell, or a zipper that repeatedly separates. Professional cleaning is especially sensible for expensive down bags or any bag that will not fit safely in your washer.
Replacement may make more sense when insulation has permanently collapsed, multiple seams are failing, the shell is brittle, or the bag no longer provides adequate warmth for its intended conditions. A musty smell that remains after proper washing and complete drying is another warning sign. Do not rely on an old bag for cold-weather trips if its loft and warmth have clearly deteriorated.
FAQ
Can I store a sleeping bag in its stuff sack?
Use the stuff sack for transportation and short-term organization, not extended storage. Compression can reduce loft, especially when the bag remains packed for weeks or months. Store it loosely in a large breathable sack instead.
Should I hang or fold my sleeping bag?
Loose storage is preferable to a sharp, permanent fold. You may drape a dry bag over a broad shelf or place it loosely in a storage sack. Avoid narrow hangers, tight rolls, and repeated folding along exactly the same line.
How do I store a down sleeping bag?
Make sure it is completely dry, use a down-safe cleaner when washing is required, and keep it uncompressed in a breathable container. Down clumps when wet, so check the footbox and baffles carefully before storage.
Can I use a plastic storage bin?
You can use a rigid bin as an outer barrier against pests, but do not compress the bag inside it or seal in moisture. Put the fully dry sleeping bag in a breathable sack first, and store the bin in a cool, dry location.