
Tent setup guide skills turn a frustrating chore into a two-minute routine: pitch taut, stake smart, and your shelter shrugs off wind and rain. This guide walks the steps and names six tools that make setup faster and more secure.
As an Amazon Associate we earn from qualifying purchases.
Our top picks




As an Amazon Associate we earn from qualifying purchases at no extra cost to you.
By Jake Thompson
How to Follow This Tent Setup Guide
The core of any tent setup guide is a repeatable sequence: pick and prep the site, lay the footprint, assemble and clip the poles, stake the corners, then attach and tension the fly. Doing these in order, every time, gets a taut, weatherproof pitch fast and avoids the scramble when weather turns.
Choose and Prep the Site
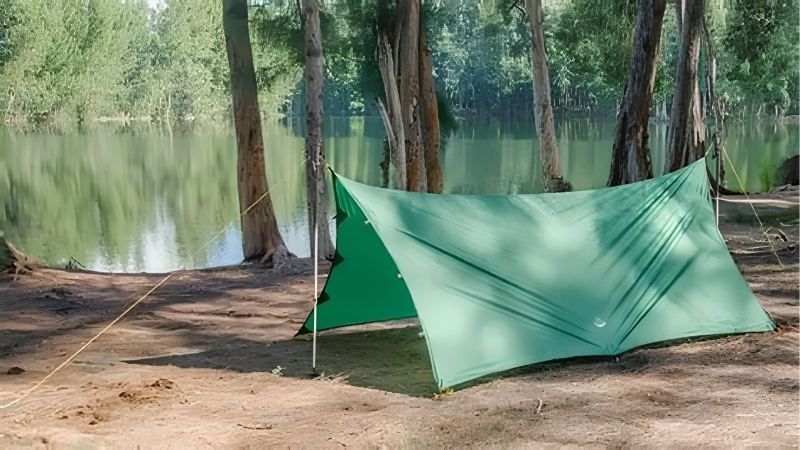
Pick flat, durable ground clear of rocks, roots and pooling spots, ideally with natural wind protection and not under dead branches. Clear debris, and note the wind direction so you can orient the tent’s smallest, strongest end into it. A good site is half of an easy, secure setup.
On established sites, use existing pads to protect the ground. Point the door away from prevailing wind and toward your view or the morning sun as conditions allow. Spending a minute choosing the spot saves fighting a bad pitch later and keeps your tent drier and more stable overnight.
Lay the Footprint and Poles
Lay a footprint or groundsheet first to protect the floor from abrasion and moisture, tucking its edges just inside the tent’s footprint so rain does not pool under you. Then assemble the shock-corded poles fully, seating each section so no joints are half-connected, which stresses and can snap them.
Spread the tent body on the footprint, then connect the poles using the tent’s hub and color coding. Clip or sleeve the body to the poles working around evenly, so tension builds symmetrically. A footprint and fully seated poles are the foundation of a fast, damage-free pitch every time.
Stake the Corners and Body
With the poles up, stake the corners, pulling each out to square the floor before driving the stake at about a 45-degree angle away from the tent for maximum hold. Work opposite corners to keep tension even, then stake any remaining body loops so the floor is taut and flat.
Push stakes in fully so they do not trip you or pull out, and in hard ground use a rock or mallet rather than stomping and bending them. Even corner tension prevents a saggy, flapping pitch, so take the extra few seconds to square the tent before moving on to the fly.
Attach and Tension the Fly
Drape the rainfly matching its corners to the tent’s, clip or buckle it on, and adjust the fly tensioners so it sits taut and slightly off the mesh body for airflow, which controls condensation. A drum-tight fly sheds rain and wind far better than a loose one.
Finally, stake out the vestibules and run the guylines to anchor points, tensioning them so the tent is stable in gusts. Guylines are the most-skipped step and the one that keeps a tent standing in wind, so use them whenever weather threatens. Now your pitch is fast, taut and weatherproof.
Top Tools From This Tent Setup Guide
These six tools make setup faster, sturdier and less frustrating, from better stakes to a footprint. This tent setup guide highlights each in the table, then breaks down who each suits and its honest drawbacks.
| Tool | Job | Best For | Approx. Price |
|---|---|---|---|
| MSR Ground Hog Stakes | Anchoring | All-around upgrade | Budget |
| MSR Mini Ground Hog Stakes | Anchoring | Lightweight upgrade | Budget |
| Manufacturer Footprint | Floor protection | Protecting the floor | Mid |
| MSR Tent Stake Hammer | Driving stakes | Hard ground | Mid |
| Reflective Guyline Cord | Stability | Wind and visibility | Budget |
| Coleman Skydome | Easy pitch | Beginners | Budget |
MSR Ground Hog Stakes — Best All-Around Upgrade
The Ground Hog is the stake most worth buying. Its Y-beam aluminum shape holds far better in most soils than the thin wire stakes bundled with tents, resisting bending and pulling out in wind. Upgrading your corner and guyline stakes to these is the cheapest way to make any pitch more secure.
They are heavier than minimalist titanium stakes and pricier than the flimsy included ones. For campers who want a dependable, hard-to-bend stake that anchors a taut pitch in real wind, though, they are the standard, and a set transforms how solidly your tent stands overnight.
MSR Mini Ground Hog Stakes — Best Lightweight Upgrade
The Mini Ground Hog brings the same Y-beam hold in a lighter, shorter package. It saves weight for backpackers while still gripping far better than wire stakes, making it a smart upgrade for those counting ounces who still want reliable anchoring for the tent body and guylines.
Its shorter length holds less in loose or sandy soil than the full-size version, where longer stakes bite better. For weight-conscious hikers on typical ground who want secure anchoring without the full-size weight, though, it is an excellent, packable upgrade over the stakes most tents include.
Manufacturer Footprint — Best for Protecting the Floor
A tent-matched footprint speeds setup and protects your investment. Cut to your tent’s exact shape, it shields the thin floor from abrasion and moisture, extends its life for years, and gives you a clean surface to build on. For any tent with a delicate floor, it is worth the small cost.
Matched footprints add a little weight and cost, and a cheap Tyvek or polycryo sheet works nearly as well for less. For campers who want a perfectly sized groundsheet that clips into the pitch and protects a pricey floor, though, the manufacturer’s footprint is the easiest, cleanest option.
MSR Tent Stake Hammer — Best for Hard Ground
The Stake Hammer earns its place on rocky or baked ground. Its weighted head drives stubborn stakes fully without bending them or bruising your hand, and a hook or claw helps pull stakes at teardown. For car campers who face hard-packed sites, it makes staking quick and painless.
It is extra weight and cost that backpackers will skip, using a rock instead. For car campers and groups who pitch big tents on hard ground and hate stomping bent stakes, though, it is a genuine convenience that speeds setup and saves your stakes from damage over many trips.
Reflective Guyline Cord — Best for Wind and Visibility
Upgraded reflective guylines make a tent both steadier and safer. Quality line with easy tensioners holds a taut pitch in wind, while the reflective strands catch headlamp light so you and your group do not trip over lines in the dark. For windy or busy sites, it is a cheap, worthwhile upgrade.
It is a minor cost and a little setup effort to re-rig lines, and fair-weather campers may rarely need the guylines. For campers who pitch in wind or exposed sites, though, reliable, visible guylines are what keep the tent standing and the campsite safe, making them a smart, inexpensive addition.
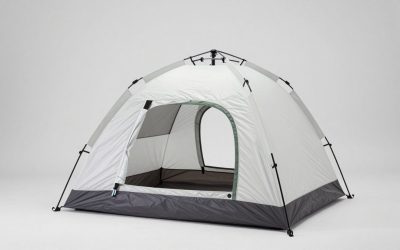
Coleman Skydome — Best for Beginners
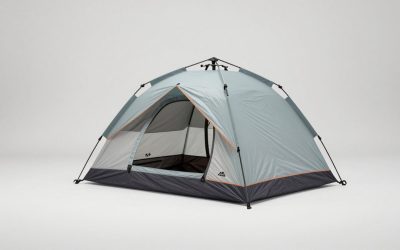
The Skydome is the easy-pitch tent that makes this whole guide simpler. Its pre-attached, color-coded pole design goes up in a few minutes with one person, so beginners get a taut pitch without a fight, at a budget price. For new campers learning to set up, it removes most of the frustration.
Its materials and weatherproofing are basic, best for fair weather, and it is heavier than premium tents. For beginners and casual campers who want the fastest, most foolproof setup at a low price, though, it is an easy recommendation and a forgiving tent to learn the steps on.
What Setup Tools Cost in 2026
Setup tools are mostly inexpensive, so timing matters little, but a couple of current market forces are worth noting when you kit out. None change the steps in this guide.
Tariffs Add Modest Cost
Stakes, hammers and footprints use imported aluminum and fabrics under tariffs that remain in place, adding modest cost. Brands have described future pricing as a moving target, but these are low-priced items, so buying the ones you need now rather than waiting is a sensible call.
The effect is small on cheap accessories. Value-focused buyers can watch for multi-packs of stakes and bundle deals, but there is little reason to delay a few dollars of setup gear that makes every pitch faster and more secure. Prioritize function over chasing a tiny discount here.
Buy Setup Gear With Your Tent
The best time to buy stakes, a footprint and guylines is alongside the tent, so your first pitch goes smoothly. Fall sale events like Prime Big Deal Days in early October and Black Friday in late November bundle accessories with tents, so timing the purchase together can save a little.
Practicing setup at home before a trip is worth more than any saving, since a smooth pitch at camp starts with knowing the steps. Buy the footprint and upgraded stakes with the tent, rehearse once in the backyard, and your setup will be fast and confident on the first real outing.
Upgrade the Cheap Stuff First
The highest-value upgrade is replacing flimsy included stakes with Ground Hogs and adding good guylines, both cheap and transformative for pitch security. Spend there before pricier accessories, since anchoring is what keeps a tent taut and standing in wind, the most common setup failure.
If a specific footprint or stake set is prone to selling out with a popular tent, buy it early rather than gambling on stock. Missing the right footprint before a trip is a small hassle, but having your setup kit ready and rehearsed is what makes pitching fast and stress-free.
Frequently Asked Questions
These are the questions campers ask most about setting up a tent.
What is the key to a fast tent setup guide?
A repeatable sequence. The best tent setup guide has you prep the site, lay the footprint, assemble poles, stake the corners, then tension the fly, in the same order every time. Practicing that routine at home once makes setup fast and confident at camp, even in fading light or wind.
Why is my tent sagging after setup?
Usually uneven corner tension or a loose fly. Stake opposite corners to square the floor before tensioning, seat every pole section fully, and adjust the fly tensioners until it sits drum-tight and slightly off the mesh. A taut pitch sheds wind and rain and prevents condensation dripping inside.
Do I really need to use guylines?
In any wind, yes. Guylines anchor the tent against gusts and are the most-skipped step that most often leads to a collapsed or flapping tent. In calm, fair weather you can sometimes skip them, but rig and tension them whenever wind or storms are possible, using reflective cord for night safety.
Should I upgrade the stakes that came with my tent?
Often, yes. Many tents ship with thin wire stakes that bend and pull out easily. Upgrading to Y-beam stakes like the MSR Ground Hog dramatically improves how securely your tent anchors in most soils, and it is one of the cheapest, highest-impact improvements you can make to any pitch.
See More:
- Best hiking backpack
- Best backpacking backpack
- Ultralight hiking backpack
- Best hydration backpack
- Best hiking backpack for women
Final Thoughts
A good tent setup guide is really a routine: prep the site, lay the footprint, raise and seat the poles, square and stake the corners, then tension the fly and guylines. Upgrade flimsy stakes to MSR Ground Hogs, add a footprint and reflective guylines, and practice once at home. Do that, and your tent will go up fast, taut and weatherproof every time.


Write Your Review
No reviews yet. Be the first to share your experience!