Key takeaways
- Buying by height alone. Two people of the same height can have different arm lengths. Use height charts as a starting point, then confirm with the elbow-angle test.
- Setting poles too long on flat ground. High shoulders, straight elbows, and pole tips planted far ahead are signs of excessive length. This can tire your shoulders and reduce control.
- Never changing the setting. One length does not suit every grade. Make small adjustments before a long climb or descent rather than forcing your body to adapt.
- Ignoring the minimum and maximum marks. Do not extend telescoping sections beyond their marked limit. Overextension can weaken the lock hold and damage the pole.
- Using wrist straps incorrectly. Slide your hand up through the bottom of the loop, then bring the strap over the palm before gripping the handle. The strap should support part of your weight without cutting into your wrist.
- Choosing a child’s pole for a short adult. A shorter adult-friendly adjustable range is preferable. Children’s poles may have smaller grips, reduced adjustment ranges, or less durable locking hardware.
The Short Answer
For most hikers, the right trekking pole length puts your elbow at roughly a 90-degree angle when the pole tip is on level ground beside your foot. As a quick starting point, multiply your height in inches by 0.68. A person who is 68 inches tall (5 feet 8 inches) will usually begin around 46 inches, or 117 cm.
Adjustable poles make sizing easier because one setting rarely suits every trail. Shorten both poles by 2 to 4 inches (5 to 10 cm) for long uphill sections. Lengthen them by 2 to 4 inches for steep descents, especially when you want more stability and a more upright posture. For sidehills, shorten the uphill-side pole and lengthen the downhill-side pole so your shoulders stay level.
Our top picks
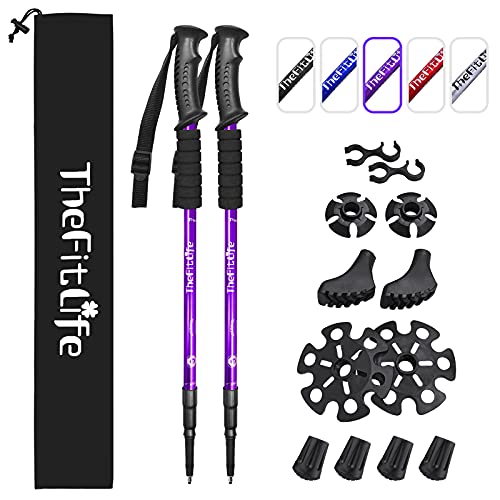
 Trekology Trek-Z Cork Grip Collapsible Lightweight Hiking
- Warranty Description: 1 Year
- Maximum Height Recommendation: 195 Centimeters
- Extended Length: 130 Centimeters


As an Amazon Associate we earn from qualifying purchases at no extra cost to you. Ratings are shown as listed on Amazon.
Most adult adjustable trekking poles cover approximately 24 to 55 inches (61 to 140 cm), which fits many hikers from about 5 feet to 6 feet 4 inches. Compact folding designs may have a more limited range, so check the listed adjustment range before buying. This matters more than the collapsed length: a pole can pack down neatly but still be too short for a tall user.
If you are between sizes, choose the longer adjustable range rather than a pole that reaches your ideal measurement only at its maximum setting. You need room to extend poles for descents and shorten them for climbing. Typical entry-level aluminum telescoping poles cost about $25 to $45 per pair, while cork-grip, carbon-fiber, and lighter folding options commonly run from about $42 to $57 per pair. Price should come after fit, lock security, grip comfort, and the terrain you plan to cover.
Standard Sizes
Use this chart as a level-ground starting point. It assumes typical hiking footwear and a neutral walking stance. Your preferred setting may vary slightly with arm length, pack weight, trail grade, and technique.
| Hiker Height | Suggested Pole Length | Suggested Pole Length | Typical Adjustable Range to Look For |
|---|---|---|---|
| Under 5 ft / under 152 cm | 35–39 in | 89–99 cm | About 80–110 cm |
| 5 ft–5 ft 3 in / 152–160 cm | 39–43 in | 99–109 cm | About 90–120 cm |
| 5 ft 4 in–5 ft 7 in / 163–170 cm | 43–45 in | 109–114 cm | About 100–125 cm |
| 5 ft 8 in–5 ft 11 in / 173–180 cm | 45–47 in | 114–119 cm | About 105–130 cm |
| 6 ft–6 ft 3 in / 183–191 cm | 47–50 in | 119–127 cm | About 110–135 cm |
| 6 ft 4 in–6 ft 6 in / 193–198 cm | 50–52 in | 127–132 cm | About 115–140 cm |
| Over 6 ft 6 in / over 198 cm | 52–55 in | 132–140 cm | About 120–140 cm or longer |
Fixed-length poles are often sold in 5 cm increments, such as 105, 110, 115, 120, 125, 130, and 135 cm. If your measurement falls between two fixed sizes, the shorter option is usually more manageable on climbs, while the longer option may feel better if you hike mostly on rolling paths or descend frequently. Adjustable poles remove much of that compromise.
How to Measure Your Space
“Space” in pole sizing means the usable distance from your hand to the ground while you stand naturally in hiking shoes. Measuring this directly is more reliable than choosing a pole solely from a height chart.
- Put on the shoes you hike in. Trail runners, hiking boots, and thick-soled winter boots can change your standing height by 1 to 2 inches.
- Stand on a hard, level floor. Keep your feet about hip-width apart and let your shoulders relax. Do not lock your knees or raise your shoulders.
- Bend one elbow to about 90 degrees. Keep your upper arm close to your side and your forearm approximately parallel to the floor.
- Measure from the floor to the top of your hand. Measure to the spot where your hand naturally rests on the grip, not to your wrist. This number is your level-ground pole setting.
- Set both poles to that measurement. For example, if the top of your grip sits comfortably at 46 inches from the floor, set the poles to 46 inches or approximately 117 cm.
- Walk for five minutes before finalizing the setting. Your elbows should remain softly bent. If you have to lift your shoulder to plant the pole, it is too long. If you bend forward or crouch to reach it, it is too short.
When checking an adjustable pole, measure from the ground-contact point of the tip to the top of the grip. Do not measure to the top of the wrist strap. The strap supports your hand but does not define the working pole length.
By Room or Use Case
Day Hiking on Rolling Trails
Start with the standard 90-degree elbow setting. This is the best all-purpose length for packed dirt, moderate elevation changes, and trails where you alternate between climbing and descending. Keep the poles within 1 inch (2.5 cm) of each other unless the trail crosses a sustained side slope.
Steep Uphill Hiking
Shorten both poles by 2 to 4 inches (5 to 10 cm). A shorter setting lets you plant the poles without reaching high behind your body and helps maintain a comfortable uphill rhythm. Very steep terrain may call for 4 to 6 inches (10 to 15 cm) shorter than your level setting, but avoid shortening so much that you hunch over.
Steep Descents
Lengthen poles by 2 to 4 inches (5 to 10 cm) from your level-ground setting. The extra reach lets you place the tips ahead of your feet and use the poles for balance before stepping down. On uneven descents, plant the pole securely before transferring weight. Poles improve stability, but they are not a substitute for careful footing.
Sidehills and Traverses
Use different lengths on each side of your body. Shorten the uphill pole by about 2 to 3 inches (5 to 8 cm) and lengthen the downhill pole by the same amount. This prevents the uphill shoulder from lifting and avoids an awkwardly deep bend at the downhill-side elbow.
Snowshoeing and Soft Ground
Set poles 2 to 4 inches longer than your normal hiking length because the tips sink into snow, sand, mud, or loose soil. Use wider snow baskets so the poles do not plunge too deeply. Check that the baskets are firmly threaded or clipped on before starting; a lost basket can make a pole feel suddenly too short.
Nordic Walking and Paved Paths
Nordic walking typically uses a slightly longer setting than casual hiking, often allowing the elbow to open beyond 90 degrees as the pole plants behind the body. Start at your normal hiking length, then increase by 1 to 2 inches (2.5 to 5 cm) if your walking technique feels cramped. Rubber tip covers protect hard surfaces and reduce clicking.
Travel, Small Storage Areas, and Car Camping
Length when packed matters if you are flying, using a small daypack, or storing gear in a compact apartment. Telescoping poles commonly collapse to roughly 24 to 28 inches (61 to 71 cm), while folding poles may pack to about 14 to 16 inches (36 to 41 cm). Confirm both the collapsed dimension and the maximum usable length. A short folded pole is convenient only if it also fits your body and terrain needs.
Common Sizing Mistakes
- Buying by height alone. Two people of the same height can have different arm lengths. Use height charts as a starting point, then confirm with the elbow-angle test.
- Setting poles too long on flat ground. High shoulders, straight elbows, and pole tips planted far ahead are signs of excessive length. This can tire your shoulders and reduce control.
- Never changing the setting. One length does not suit every grade. Make small adjustments before a long climb or descent rather than forcing your body to adapt.
- Ignoring the minimum and maximum marks. Do not extend telescoping sections beyond their marked limit. Overextension can weaken the lock hold and damage the pole.
- Using wrist straps incorrectly. Slide your hand up through the bottom of the loop, then bring the strap over the palm before gripping the handle. The strap should support part of your weight without cutting into your wrist.
- Choosing a child’s pole for a short adult. A shorter adult-friendly adjustable range is preferable. Children’s poles may have smaller grips, reduced adjustment ranges, or less durable locking hardware.
FAQ
What trekking pole length do I need if I am between two sizes?
Choose adjustable poles whenever possible. For fixed-length poles, select the shorter size if you hike steep climbs often or prefer a compact, close-to-body pole plant. Select the longer size if you primarily walk gentle terrain and need more reach on descents. In either case, your elbow should be near 90 degrees on level ground.
Should trekking poles be the same length?
Yes, on flat or evenly graded ground, both poles should generally match. Adjust them differently only for traverses, sidehills, or when one side of your body is consistently higher than the other. On a sidehill, use a shorter uphill pole and a longer downhill pole.
How long should trekking poles be for a 6-foot person?
A 6-foot hiker will commonly start around 47 to 49 inches, or 119 to 124 cm, on level ground. Many people at this height are well served by poles that adjust to at least 130 cm, giving them room to lengthen the poles for downhills.
Are carbon-fiber trekking poles sized differently from aluminum poles?
No. Material affects weight, vibration feel, durability characteristics, and price, not the correct length. Size carbon-fiber and aluminum poles with the same elbow-angle method. In 2026, the most useful buying comparison is still the adjustment range and lock design, followed by grip comfort and packed length—not simply the pole material.