Key takeaways
- Uphill: Reduce length by approximately 2 to 4 inches to keep the poles close to your body.
- Downhill: Add approximately 2 to 4 inches for extra reach and stability.
- Traversing a slope: Set the downhill pole longer and the uphill pole shorter, often by 1 to 3 inches.
- Nordic walking: Poles are often shorter than hiking poles, commonly around 0.66 times your height, because the technique uses a purposeful backward swing.
Choosing trekking pole length sounds simple until a pair feels too tall on climbs, too short on descents, or awkward on level ground. The most common mistake is buying based only on height. Your arm length, walking style, terrain, grip position, and whether you use the poles for hiking or Nordic walking all affect the right setting.
Another frequent error is treating the advertised maximum length as the ideal length. A pole that extends to 54 inches is not automatically suitable for a tall hiker, just as a compact 24-inch folded size does not tell you whether it will fit in your pack. For 2026, the best buying decision is to match the usable adjustment range and construction to the way you actually walk.
Our top picks
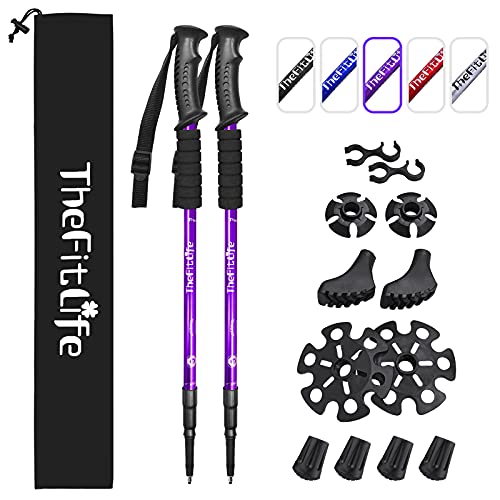
 Trekology Trek-Z Cork Grip Collapsible Lightweight Hiking
- Warranty Description: 1 Year
- Maximum Height Recommendation: 195 Centimeters
- Extended Length: 130 Centimeters


As an Amazon Associate we earn from qualifying purchases at no extra cost to you. Ratings are shown as listed on Amazon.
Decide These 3 Things First
- Your baseline length: Measure from the ground to the crease of your wrist while your elbow is bent at approximately 90 degrees. This gives you a useful starting point, although most hikers adjust from there.
- Your terrain: Level trails generally call for an elbow angle near 90 degrees. Shorten the poles by about 2 to 4 inches for sustained uphill travel and lengthen them by about 2 to 4 inches for steep descents.
- Your carrying priorities: Decide whether you value low weight, small packed size, maximum stiffness, or a lower price. A compact three-section pole may pack better than a two-section model, while a heavier aluminum pole may tolerate rougher handling.
Once these choices are clear, the correct length becomes easier to identify. Look for a pair that adjusts across your preferred range rather than one that barely reaches your target setting.
Size: Start With Height, Then Adjust for Terrain
A common starting formula is to multiply your height in inches by 0.68. Someone who is 5 feet 6 inches tall, or 66 inches, would begin at roughly 45 inches. Someone who is 6 feet tall would start near 49 inches. This is only a starting point because torso length, arm length, and grip design vary.
For level walking, set the pole so your elbow is bent between 85 and 100 degrees when the tip touches the ground near your foot. If your shoulders rise or your elbows feel tightly folded, shorten the poles. If you lean forward or have to reach down, lengthen them.
- Uphill: Reduce length by approximately 2 to 4 inches to keep the poles close to your body.
- Downhill: Add approximately 2 to 4 inches for extra reach and stability.
- Traversing a slope: Set the downhill pole longer and the uphill pole shorter, often by 1 to 3 inches.
- Nordic walking: Poles are often shorter than hiking poles, commonly around 0.66 times your height, because the technique uses a purposeful backward swing.
For most adult hikers, a usable range of about 24 to 54 inches covers a wide variety of heights. Check the minimum length as carefully as the maximum. A tall pair that collapses only to 30 inches may be inconvenient to strap to a small daypack.
Material: Aluminum or Carbon Fiber?
Aluminum is usually the value choice. It is resilient, widely available, and generally less expensive to replace after a hard impact. Most aluminum trekking poles weigh roughly 8 to 12 ounces per pole, depending on length, shaft diameter, handles, and baskets. A pair in this category can be a practical choice for beginners, occasional hikers, and rocky routes where impacts are likely.
Carbon fiber is typically lighter and can reduce vibration, especially when the shaft uses multiple carbon sections. Many carbon models weigh approximately 6 to 9 ounces per pole. The trade-off is price and impact behavior: carbon can be very stiff, but a severe side load or sharp strike may cause cracking rather than a visible bend. Inspect carbon poles after falls or impacts.
Material should not be judged alone. A well-designed aluminum pole can feel more secure than a poorly made carbon pole if its locks, joints, and grip are better. For a first pair, an aluminum model around $25 to $40 can be perfectly serviceable. Carbon models commonly begin around $45 and may exceed $100 when they add premium handles, lighter hardware, or specialized folding systems.
Construction: Telescopic Versus Folding
Telescopic poles use overlapping shaft sections that slide into one another. They are usually simple to adjust and often provide a broad range, such as 24 to 54 inches. A two- or three-section telescopic design is a good fit for hikers who want straightforward setup and dependable adjustability.
Folding poles use sections connected by an internal cord. They commonly pack to about 13 to 16 inches, compared with approximately 22 to 26 inches for many telescopic poles. That shorter folded length is useful for air travel, small backpacks, and hikes where poles are carried more often than they are used.
The compromise is a narrower adjustment range. A folding pole may adjust from around 43 to 51 inches, while a telescopic pole may cover 24 to 54 inches. Some folding models use a short adjustable top section to improve flexibility, but they still may not suit very short or very tall users.
Look for metal or reinforced locking hardware, clear length markings, and sections that seat fully before use. Flip locks are easy to operate with gloves and can be tightened without tools. Twist locks create a clean profile but may be harder to adjust consistently if dirt enters the shaft.
Comfort and Performance: Grip, Strap, Tip, and Shock
Cork grips are popular because they manage moisture and gradually conform to the hand. EVA foam grips are often lighter and extend farther down the shaft, giving you another hand position when climbing. Rubber handles are easy to clean and can be comfortable for casual walking, though they may feel warmer or less breathable on long outings.
Grip length commonly falls between 4 and 5 inches. If you have large hands or change hand positions frequently, prioritize a longer grip or an extended foam section. A padded, adjustable strap should sit around the wrist without cutting into it. The strap should support a relaxed hold; you should not need to squeeze the handle tightly.
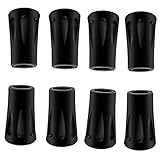
Carbide or hardened tips are useful on dirt, gravel, and mixed trails. Rubber tips can protect indoor floors, rock surfaces, and delicate terrain, but they may wear faster. Check whether replacement tips and baskets are included. Small baskets help prevent the tip from sinking into soft ground, while larger snow baskets are needed for winter use.
Anti-shock systems add a spring or elastomer mechanism to soften some impacts. They can feel comfortable on pavement and hard-packed paths, but they also add weight and may reduce the crisp feel some hikers prefer. Anti-shock is not a substitute for correct length, secure locks, or good technique.
Price Tiers: What You Get for Your Money
Budget: $20 to $35 per pair. Expect aluminum shafts, basic foam or plastic grips, simple straps, and telescoping adjustment. A pair around $25 can work for occasional hikes, neighborhood walking, and light-to-moderate trails. Inspect the locks carefully and avoid assuming that an anti-shock feature indicates premium construction.
Midrange: $36 to $65 per pair. This tier commonly adds cork or improved EVA grips, better straps, stronger flip locks, and a lighter design. Collapsible models around $40 to under $50 may be appealing if compact storage matters. A carbon-fiber pair around $55 can reduce weight, but compare its packed size and adjustment range before choosing it over aluminum.
Premium: $66 to $150 or more per pair. Higher prices may buy lower weight, refined folding hardware, replaceable components, better grip materials, and more consistent quality control. Premium pricing is most worthwhile for frequent hikers, travelers, and users who carry poles for many miles each week. It is less compelling if you hike only a few times a year on gentle trails.
Warranty: Check What Is Actually Covered
Warranty length can range from 30 days to several years. Read the exclusions before treating a long warranty as a deciding advantage. Many warranties cover manufacturing defects but exclude normal tip wear, damaged cords, accidental impacts, misuse, and cosmetic scratches.
Confirm whether the company replaces one pole or requires the return of the entire pair. Also check whether replacement parts are sold separately. A set with available tips, baskets, straps, and locking hardware may have a lower long-term cost than a cheaper pair that must be discarded after one small failure.
Keep your receipt and record the model name. If the pole has a serial number or adjustment instructions, save a photo of them. These details can make a warranty claim easier.
Delivery and Assembly: Plan for Setup Before the Trail
Most trekking poles require little assembly, but folding designs may need the internal cord tension set correctly. Allow 10 to 15 minutes at home to unfold the sections, lock the connector, adjust the length, and test the straps. Do not wait until the trailhead to discover that a section will not lock.
When the package arrives, check every section for dents, cracks, uneven seams, or loose hardware. Extend each pole to its intended setting and apply firm downward pressure with your hand. The pole should not collapse or rotate. Do not test it by throwing your full body weight onto it; trekking poles are balance aids, not climbing supports.
For online purchases, compare the delivered package size and return window. A pair listed at 14 inches folded may arrive with baskets, tips, or a storage bag that adds several inches to the package. A return period of at least 30 days gives you time to test the adjustment system indoors and on a short walk.
Spec Checklist
| Spec | Budget | Mid | Premium |
|---|---|---|---|
| Typical price per pair | $20–$35 | $36–$65 | $66–$150+ |
| Typical weight per pole | 8–12 oz | 7–10 oz | 5.5–9 oz |
| Common adjustment range | 24–54 in. | 24–54 in. or 43–51 in. | 24–54 in. or 13–16 in. folded |
| Construction | Two- or three-section aluminum | Aluminum or carbon; telescopic or folding | Light carbon or refined folding systems |
| Grip | Foam, plastic, or rubber | Cork or EVA foam | Cork, extended foam, or ergonomic composite |
| Useful extras | Basic straps and baskets | Flip locks, rubber tips, storage bag | Replaceable parts, refined straps, multiple baskets |
Red Flags
- A claimed load rating without a clear testing standard or explanation.
- Locks that slip when you press down firmly with your hands.
- No stated minimum and maximum length.
- A folding pole with no instructions for cord tension or section alignment.
- Carbon fiber priced unusually low with no material specification.
- Handles that are smooth, undersized, or paired with thin, nonadjustable straps.
- No information about replacement tips, baskets, or warranty coverage.
- Reviews focused only on appearance, with no mention of lock security after repeated use.
FAQ
How do I calculate trekking pole length from my height?
Multiply your height in inches by approximately 0.68 for a hiking starting point. Then adjust until your elbow sits near a 90-degree angle on level ground. Your correct setting may differ by 1 to 3 inches because arm length and grip height vary.
Should trekking poles be the same length on both sides?
Use equal lengths on level ground. On a side slope, make the downhill pole about 1 to 3 inches longer and the uphill pole shorter. Return both poles to the same setting when the trail becomes level.
Are folding trekking poles better than telescoping poles?
Neither design is universally better. Folding poles pack smaller, often around 13 to 16 inches, while telescoping poles usually offer a wider adjustment range and simpler field repairs. Choose folding for compact storage and telescoping for maximum versatility.
How tight should trekking pole locks be?
Locks should hold the marked length without slipping when you apply firm hand pressure. Tighten a flip-lock adjustment screw gradually if needed. Do not overtighten, force a dirty mechanism, or use a pole that still collapses after adjustment.