Key takeaways
- Ordering by appearance alone. Similar-looking tips can have different opening diameters and different internal depths. Measure the pole end first.
- Using rubber caps on terrain where you need exposed points. Rubber feet are useful on pavement, rock, travel, and indoor surfaces. Remove them when you need a carbide point to bite into ice, packed dirt, or slippery trail conditions.
- Installing one new cap and one badly worn cap. Uneven wear can change grip and effective pole length. Replace both when possible.
- Forcing a cap with tools. Hammering, clamping, or prying can split rubber and damage a carbon-fiber or aluminum pole shaft.
- Ignoring a loose fit. A cap that comes off during a hike can become litter and leave you with an exposed point on a surface where it is not appropriate.
- Storing wet tips in a sealed bag. Remove mud and moisture after use to reduce odor, mildew, and deterioration of the rubber.
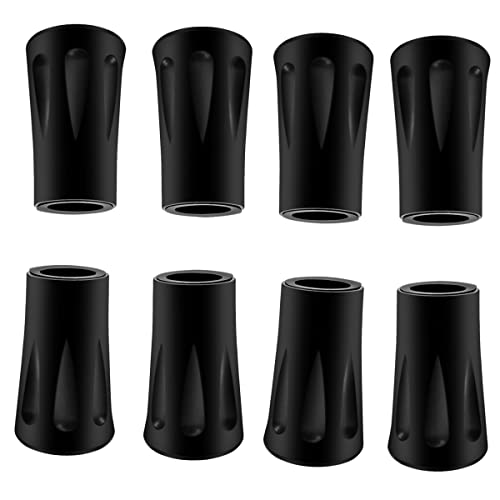
Worn or missing trekking pole tips can make every step less stable. A loose rubber tip may slip off mid-hike, expose the metal or carbide point on pavement, damage indoor flooring, and create extra noise and vibration. Installing the wrong size can be just as frustrating: a cap that is too tight may split, while one that is too loose can twist or fly off in mud. The good news is that replacing standard rubber trekking pole tips is usually a quick, tool-free job when you measure first and seat the new tip fully.
Most replacement rubber feet cost about $6 to $12 per multipack in 2026. They are commonly sold with an 11 mm inner-hole diameter, which fits many standard trekking and walking poles, but “most” does not mean all. Check your pole before ordering.
Our top picks

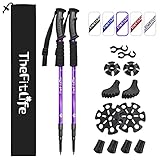
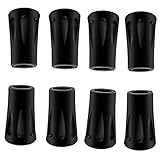
As an Amazon Associate we earn from qualifying purchases at no extra cost to you. Ratings are shown as listed on Amazon.
What You Need
| Item | Why | Optional? |
|---|---|---|
| Replacement rubber trekking pole tips | Provide fresh traction and cover the pole’s metal or carbide tip. Match the inner-hole diameter to your pole. | No |
| Ruler or digital caliper | Measures the pole tip or lower shaft diameter. Many universal caps have an 11 mm opening. | Recommended |
| Clean rag | Removes grit, mud, and moisture that can prevent a secure fit. | No |
| Warm water and small bowl | Softens a stiff rubber cap so it is easier to push onto the pole. | Optional |
| Work gloves | Protect hands from a sharp carbide tip and improve grip on stubborn old caps. | Optional |
| Needle-nose pliers | Can help remove a torn cap lodged around the tip. Use carefully to avoid scratching the shaft. | Optional |
Step-by-Step
-
Inspect the existing tips and pole ends (3 minutes)
Set both poles on a flat surface and look at the bottom of each one. Rubber tips are usually cup-shaped caps that press over a pointed carbide or steel tip. Check for cracks, a worn-through sole, a loose fit, or an unevenly worn edge. If the rubber has worn down enough that the metal point is visible, replace it before using the poles on hard surfaces.
Also inspect the pole itself. The lower shaft should not be split, bent, or badly corroded. A replacement rubber cap will not fix a damaged pole tip assembly. If your poles use screw-on baskets, threaded feet, or a brand-specific tip system rather than simple push-on caps, consult the pole manufacturer’s instructions before buying universal replacements.
-
Measure before choosing new tips (5 minutes)
Remove one old rubber tip if possible, then measure the outside diameter of the metal point area or the narrow end of the lower pole shaft where the cap seats. Measure in millimeters. Standard replacement tips frequently have an inner opening around 11 mm, but diameters can vary by pole design.
If you do not have calipers, place a ruler across the widest part of the pole end. Do not estimate based only on the product label “fits most poles.” A replacement should feel snug enough that it cannot be pulled off with normal hand pressure, yet it should not require cutting, drilling, or extreme force to install.
-
Remove the old rubber tip (2 to 5 minutes per pole)
Hold the pole firmly near the bottom shaft, not by the handle. Twist the old rubber foot back and forth while pulling it straight away from the pole. Twisting breaks the grip created by dirt, moisture, and compressed rubber. Avoid yanking sideways, which can bend a thin metal point or stress the lower shaft.
If the cap is brittle and tears, peel away the larger pieces by hand. For a small piece stuck around the tip, use needle-nose pliers only on the rubber. Keep the pliers away from carbon-fiber shaft material and avoid gripping the carbide point directly. Wear gloves if the exposed tip is sharp.
-
Clean and dry the pole tip (3 minutes)
Use a rag to remove packed soil, small stones, road grit, and old rubber residue. Check the point and surrounding ferrule for burrs or sharp damaged edges. A rough edge can cut into a new cap and cause premature splitting.
Wipe the area dry before installation. Do not apply oil, grease, soap, or silicone spray to make the cap slide on. Lubricants can leave the tip too loose, allowing it to rotate or detach during a walk. If a cap is extremely difficult to fit, soften the rubber instead of lubricating the pole.
-
Warm a tight replacement cap if necessary (5 minutes)
If the new cap feels very stiff, place only the rubber tip in warm—not boiling—water for about three to five minutes. Water around 100°F to 120°F is enough to make rubber more flexible without risking burns or warping. Dry the outside of the cap afterward so you can grip it securely.
This step is most helpful in cold weather or with thick, shock-absorbing rubber feet. Do not use an open flame, heat gun, hair dryer on high heat, or microwave. Excess heat can deform the rubber and shorten its service life.
-
Press and twist the new tip into place (2 minutes per pole)
Position the opening of the new rubber tip directly over the pole point. Push straight down while twisting the cap clockwise and counterclockwise. Continue until the metal point is fully seated inside the rubber and the cap sits evenly against the pole end.
Some tips have an internal stop or a molded base that makes full seating easy to feel. Others simply fit tightly over the shaft. In either case, the cap should not sit crookedly, leave an exposed point, or wobble from side to side. Repeat the process on the second pole, even if only one original tip was missing; matched tips provide more predictable traction and height.
-
Test the fit before your next hike (3 minutes)
With the poles collapsed or adjusted short, press each rubber foot firmly onto a hard floor or sidewalk. Put moderate downward pressure on the handle and listen for clicking, shifting, or metal contact. Then try to twist and pull each cap off by hand. A properly fitted tip may rotate slightly under force, but it should not slide off.
Walk a short distance on a dry, smooth surface. If a cap feels unstable, remove it and confirm that dirt is not trapped inside and that the diameter is correct. Do not rely on tape or glue as a permanent fix; both can fail when wet, muddy, hot, or cold.
Mistakes to Avoid
- Ordering by appearance alone. Similar-looking tips can have different opening diameters and different internal depths. Measure the pole end first.
- Using rubber caps on terrain where you need exposed points. Rubber feet are useful on pavement, rock, travel, and indoor surfaces. Remove them when you need a carbide point to bite into ice, packed dirt, or slippery trail conditions.
- Installing one new cap and one badly worn cap. Uneven wear can change grip and effective pole length. Replace both when possible.
- Forcing a cap with tools. Hammering, clamping, or prying can split rubber and damage a carbon-fiber or aluminum pole shaft.
- Ignoring a loose fit. A cap that comes off during a hike can become litter and leave you with an exposed point on a surface where it is not appropriate.
- Storing wet tips in a sealed bag. Remove mud and moisture after use to reduce odor, mildew, and deterioration of the rubber.
How Often
There is no fixed mileage schedule because rubber tip wear depends on your body weight, pole technique, pavement use, temperature, and terrain. Check the tips before every longer outing and after hikes involving asphalt, concrete, or rough rock. Pavement wears rubber much faster than soil or grass.
Replace tips immediately when the carbide or metal point shows through, the bottom is worn unevenly enough to feel unstable, deep cracks appear around the sidewall, or the cap no longer stays on securely. For frequent walkers who use poles on sidewalks several times a week, inspection every month is sensible. Occasional hikers may need replacement only every season or two.
When to Call a Pro or Replace
You usually do not need professional help for push-on rubber tips. Consider contacting the pole manufacturer or visiting an outdoor gear repair shop if the underlying carbide point is loose, broken, bent, or missing; the lower shaft is cracked; a threaded tip assembly is stripped; or the pole uses a proprietary attachment system.
Replace the entire pole, or at least the damaged lower section if the brand sells parts, when a carbon-fiber shaft has a visible split or soft spot, an aluminum shaft is significantly bent, or the locking mechanism slips under load. Do not continue hiking with a compromised pole just because a new rubber foot makes it look usable.
FAQ
Do all trekking pole tips fit all trekking poles?
No. Many rubber replacement tips are marketed as universal and fit common pole sizes, often around an 11 mm inner opening, but not every pole has the same diameter or tip shape. Measure your pole end and compare it with the replacement’s stated inside diameter and depth.
Can I use trekking pole rubber tips on a walking cane?
Sometimes. A rubber trekking pole cap can work on a cane if the cane’s lower end matches the cap’s diameter and the cap sits securely. However, canes often need broader, flatter feet designed for everyday weight-bearing on indoor floors and sidewalks. Use a cane-specific tip when the fit or stability is uncertain.
Should rubber tips stay on during trail hiking?
It depends on the surface. Keep them on for pavement, smooth rock, indoor areas, and travel situations where you want quieter contact and less surface damage. Remove them for icy, muddy, or steep natural terrain when you need the exposed pole point for better purchase.
Why do my new rubber tips keep falling off?
The most common causes are an opening that is too large, mud or moisture inside the cap, incomplete installation, or a pole end that is unusually tapered. Clean and dry both parts, push the cap on fully, and test it. If it still pulls off easily, use a correctly sized replacement rather than glue or tape.