Key takeaways
- Sealing a dirty or wet surface: Adhesive bonds to grime instead of fabric and can lift after one storm.
- Using duct tape as a permanent fix: It can leave residue and may pull away tent coatings. Use purpose-made repair tape for a lasting patch.
- Applying sealant to the wrong side: Check whether the seam is exposed on the interior or exterior and follow the product directions.
- Ignoring fabric compatibility: Silicone-coated fabric needs silicone-compatible products; PU sealant is not a universal solution.
- Making patches too small: Leave at least 1 inch of overlap around ordinary damage and 2 inches near high-stress points.
- Overloading a seam with sealant: Thick beads can remain tacky, collect dirt, and crack during folding.
- Drying with intense heat: Direct heat can shrink or melt synthetic fabric and damage waterproof coatings.
- Repairing without checking the setup: A loose fly, blocked vent, or low spot can mimic a fabric failure.
A leaking tent can turn a comfortable trip into a cold, wet night, but many repairs are manageable with the right preparation. The key is finding the true entry point rather than coating every seam with sealant. Water may enter through a pinhole in the rainfly, a failed seam, a damaged floor, a loose guyline point, or condensation that only looks like a leak.
Repairing fabric while it is dirty, damp, or under tension can make the damage worse. Adhesive may peel away, tape may trap moisture, and an overly thick sealant bead can crack when the tent is folded. This guide explains how to diagnose and repair a leaking tent at home or at camp, including practical methods to use in 2026.
As an Amazon Associate we earn from qualifying purchases at no extra cost to you. Product prices and availability are accurate as of the date shown and are subject to change.


What You Need
| Item | Why | Optional? |
|---|---|---|
| Clean, dry work surface | Prevents dirt and moisture from weakening the repair | No |
| Mild soap and water | Removes mud, body oils, and residue | No |
| Lint-free cloths | Dries the fabric without leaving fibers behind | No |
| Rubbing alcohol, 70% | Helps remove grease before applying compatible adhesive | Yes; check the tent manufacturer’s care instructions first |
| GEAR AID Tenacious Tape, 3-inch by 20-inch, clear, about $5-$12 per roll | Patches holes and tears in many nylon or fabric tent surfaces | Yes, for holes and tears |
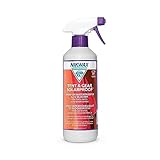
| GEAR AID Seam Grip WP, 1-ounce tube, about $8-$15 | Seals leaking seams and bonds compatible tent fabrics | Yes, for seam leaks |
| Small scissors | Cuts rounded patches and removes loose threads | Yes, but useful |
| Painter’s tape | Marks the leak and holds fabric flat during application | Yes |
| Disposable nitrile gloves | Protects hands from sealant and makes cleanup easier | Yes |
Before using any adhesive, identify whether the tent is coated with polyurethane, commonly marked PU, or silicone. A PU-compatible product such as Seam Grip WP may not adhere properly to silicone-coated fabric. Silicone tents generally require a silicone-compatible seam sealer. Always follow the tent and repair-product instructions.
Step-by-Step
-
Find the actual leak — 10 to 20 minutes
Set up the tent fully, including the rainfly, and inspect it during or immediately after rain if possible. Look for darkened fabric, beads of water, wet floor spots, and drips along corners or seams. Water can travel several inches from the original hole before appearing inside.
For a controlled test, place the tent outdoors and lightly spray the fly with a hose using a gentle shower setting. Do not use a pressure nozzle. Work in sections and wait two to five minutes after wetting each area. Mark suspected points with painter’s tape on the outside. Avoid flooding the tent interior or forcing water through fabric that would normally be protected by a rainfly.
-
Inspect the structure and setup — 5 to 10 minutes
Confirm that the rainfly is installed with the correct side facing out and that it is not touching the inner tent. Tighten or reposition guylines so water sheds away from the tent. Check that the bathtub floor is not folded over, that doors are fully closed, and that the tent is not pitched in a depression where runoff can collect.
Also check for condensation. Moisture on the ceiling or walls without a corresponding hole may come from breathing, wet clothing, or poor ventilation. Open roof vents and doors while keeping mesh closed when conditions allow. Condensation requires ventilation, not patching.
-
Clean and dry the damaged area — 20 to 60 minutes
Take down the tent if needed and wipe the repair area with mild soap and water. Remove mud, dust, sunscreen, and tree sap. Rinse away soap residue, then blot with a clean cloth. Let the fabric air-dry completely; depending on humidity, this may take 20 minutes to several hours.
Do not apply sealant to damp fabric. Do not use a hair dryer, iron, or space heater directly on nylon or polyester. Excessive heat can distort coatings, weaken fibers, or create a larger hole. If the manufacturer permits it, a small amount of 70% rubbing alcohol on a cloth can remove oily residue, but test an inconspicuous spot first.
-
Patch holes and tears with repair tape — 10 to 15 minutes
For a pinhole, cut a patch at least 1 inch larger than the damaged area on every side. For example, a 1/4-inch hole needs a patch about 2 1/4 inches across. Round the corners rather than leaving sharp 90-degree edges, which are more likely to catch and peel.
For a tear, bring the edges together without overlapping them. Cut a patch that extends at least 1 inch beyond the tear in every direction; use a 2-inch margin for a high-stress location such as a pole sleeve or guy-out point. Apply the tape slowly from one edge, pressing outward to remove air bubbles. Burnish it firmly with a smooth spoon, card, or the back of a fingernail.
When possible, apply a second patch to the opposite side of the fabric. Stagger the edges slightly so both patches do not peel from the same line. Allow the adhesive to bond on a flat surface for the time stated on the package, commonly several hours before serious use.
-
Seal leaking seams — 15 to 30 minutes
Turn the rainfly or tent body so the leaking seam is accessible and the fabric lies flat. Apply a narrow, continuous bead of Seam Grip WP or another compatible sealer directly over the stitching. A bead approximately 1/8 inch wide is usually sufficient; a thick mound takes longer to cure and adds unnecessary weight.
Spread the sealant 1/4 to 1/2 inch beyond both sides of the stitched line using a gloved finger or disposable applicator. Pay special attention to corners, zipper ends, pole sleeves, and webbing attachment points. Wipe away excess before it skins over. If the seam is badly separated, use compatible repair tape to hold the fabric together first, then seal over the tape edges.
Leave the tent open and flat while the product cures. Many seam sealers need at least 8 to 12 hours, and some perform better after 24 hours. Follow the tube’s instructions rather than packing the tent immediately.
-
Test the repair — 10 to 15 minutes
After the patch or sealant has cured, pitch the tent again and repeat a gentle spray test. Begin with the repaired area, then check the floor, corners, and nearby seams. If water still appears, dry the tent and mark the new entry point. Do not assume the first repair failed; water may be coming from a second hole a few inches away.
Pack the tent only when the fabric and repair are completely dry. Store it loosely in a breathable bag instead of compressing it while the adhesive is still soft.
Mistakes to Avoid
- Sealing a dirty or wet surface: Adhesive bonds to grime instead of fabric and can lift after one storm.
- Using duct tape as a permanent fix: It can leave residue and may pull away tent coatings. Use purpose-made repair tape for a lasting patch.
- Applying sealant to the wrong side: Check whether the seam is exposed on the interior or exterior and follow the product directions.
- Ignoring fabric compatibility: Silicone-coated fabric needs silicone-compatible products; PU sealant is not a universal solution.
- Making patches too small: Leave at least 1 inch of overlap around ordinary damage and 2 inches near high-stress points.
- Overloading a seam with sealant: Thick beads can remain tacky, collect dirt, and crack during folding.
- Drying with intense heat: Direct heat can shrink or melt synthetic fabric and damage waterproof coatings.
- Repairing without checking the setup: A loose fly, blocked vent, or low spot can mimic a fabric failure.
How Often
Inspect the tent before every major trip and after any storm, especially if it was exposed to sharp branches, strong wind, or extended rain. Check seams, floor corners, zipper ends, guy-out points, and the rainfly’s highest surfaces. A quick inspection takes about five minutes.
Reapply seam sealer when you see peeling, pinholes, flaking, or visible gaps—not simply because a certain number of months has passed. With regular use, a detailed inspection once or twice a year is sensible. Clean and dry the tent fully before long-term storage, and never store it damp for more than a few hours.
When to Call a Pro or Replace
Consider professional repair when a tear exceeds roughly 6 to 8 inches, crosses a load-bearing seam, damages a pole sleeve, or involves multiple layers that no longer align. A specialist can replace panels, reinforce attachment points, and restore zippers more reliably than a surface patch.
Replacement may be more practical when the waterproof coating is broadly peeling, the floor has many brittle areas, the fabric has become sticky or powdery, or leaks appear across several unrelated seams. If the tent is needed for severe weather, do not rely on a small patch for a structural failure. A repair that holds in light rain may not withstand wind, snow load, or repeated setup.
FAQ
Can I repair a leaking tent while camping?
Yes, for a temporary fix. Dry the area as much as possible, wipe away dirt, and apply a repair patch at least 1 inch beyond the hole. Press it firmly and keep the damaged area under cover. Treat this as an emergency repair and complete a proper cleaning and curing process at home.
How do I tell a leak from condensation?
A leak usually appears in one repeatable location, often beneath a hole or seam, and increases when that area is sprayed. Condensation forms as a general film or scattered droplets, especially on the underside of the rainfly, and improves with ventilation.
Can I use repair tape on a seam?
Yes, if the tape is compatible with the fabric and extends at least 1 inch beyond the damaged stitching. For a seam that is still stitched but no longer waterproof, a thin bead of compatible seam sealer usually creates a cleaner, more flexible repair.
How long should a tent repair cure before rain?
Follow the product label, but plan on at least 8 to 12 hours for many sealants and up to 24 hours for a dependable cure. Keep the repaired fabric flat, dry, and free of tension during that period.