
Key takeaways
What's inside
Best hiking Yosemite trips work best when you match the trail to your fitness and the season. This guide sorts six routes from gentle family walks to strenuous granite summits, with real distances, elevation, and the ideal time of year to hike each, plus a packing list so you head out prepared for the park’s fast-changing conditions.
As an Amazon Associate we earn from qualifying purchases at no extra cost to you. Product prices and availability are accurate as of the date shown and are subject to change.


![Yosemite Day Hikes and National Park Map [Map Pack Bundle] (National Geographic Trails Illustrated Map)](https://m.media-amazon.com/images/I/81JiL2h8mCL._AC_UY218_.jpg)


As an Amazon Associate we earn from qualifying purchases at no extra cost to you. Product prices and availability are accurate as of the date shown and are subject to change.
🛒 Best Price Today on Amazon
Prime members get fast, free shipping on everything above, plus member-only deals. New members get a 30-day free trial — cancel anytime.
Easy and Family-Friendly Hikes
If you’re new to hiking, traveling with kids, or just want big scenery without a big effort, start here. These gentler routes still deliver classic Yosemite views and are among the best hiking Yosemite options for a relaxed day. None require special fitness, and all sit on or near the Valley floor.
Mirror Lake
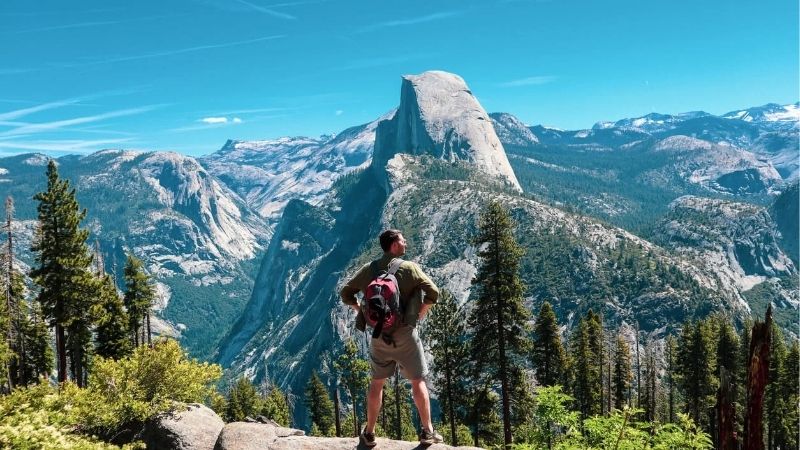
An easy 2-to-4.4-mile round trip with only about 100 to 300 feet of gain, Mirror Lake is mostly flat and partly paved, making it ideal for families. In spring the seasonal lake mirrors Half Dome overhead, though it often dries to a meadow by late summer. The path is shaded in parts, a welcome break on warm afternoons.
Go in spring or early summer for the classic reflection and flowing water. You can extend the walk along the Valley Loop Trail if you want a bit more distance without more climbing. Early mornings are calm and quiet, with the best light for photographing Half Dome reflected in the water.
Sentinel Dome
This short 2-mile round trip near Glacier Point gains only a few hundred feet yet rewards you with a jaw-dropping 360-degree summit view, including Half Dome. It’s an easy-to-moderate outing with an outsized payoff for the effort. The short granite dome is smooth and simple to walk once you reach the top.
The trailhead sits on Glacier Point Road, which is open roughly late spring through fall, so plan a warm-season visit. Sunset here is spectacular, but carry a headlamp if you linger for the colors. Short as it is, it’s one of the best hiking Yosemite payoffs for the effort involved.
Lower Yosemite Fall
A flat, paved, roughly 1-mile loop, Lower Yosemite Fall is one of the easiest and most rewarding walks in the valley. It puts you at the base of the thundering lower cascade, which roars loudest in spring snowmelt. Benches nearby make it an easy spot to rest and soak in the view.
It’s wheelchair and stroller friendly and perfect as a first stop. Visit in spring for maximum water, since the fall can slow to a trickle or vanish by late summer. Interpretive signs along the loop explain the geology and history, making it a fun stop with curious kids.
Strenuous Bucket-List Hikes
For experienced, well-conditioned hikers, these three are the crown jewels. They demand an early start, real fitness, and careful preparation, but they deliver the most unforgettable views in the park. These are the best hiking Yosemite has for seasoned adventurers chasing its biggest summits.
Half Dome via the Mist Trail
About 14 to 16 miles round trip with roughly 4,800 feet of gain, Half Dome is strenuous and takes 10 to 12 hours. The final ascent climbs bare granite on fixed cables, which is dangerous when wet, and the hike requires a permit issued by lottery.
Start before dawn, set a firm turnaround time, and pack gloves for the cables and a headlamp for the finish. It’s best hiked in summer and early fall when the cables are up and the granite is dry. Break in your shoes beforehand and train on stairs, because the relentless climb punishes the unprepared.
Clouds Rest
Roughly 14 miles round trip from Sunrise Lakes with about 2,800 feet of gain, Clouds Rest is strenuous and, unlike Half Dome, needs no permit. Its summit stands over 1,000 feet higher, ending on a narrow granite ridge with sweeping 360-degree views.
The Tioga Road trailhead opens only in the warm season, typically late spring through fall. The final ridge is exposed, so save it for a clear, dry day and sure footing. Because it skips the permit lottery, it’s a smart backup plan if you miss out on a Half Dome slot.
Upper Yosemite Falls Trail
This strenuous 7.2-mile round trip climbs about 2,600 feet to the brink of North America’s tallest waterfall. Columbia Rock offers a stunning midway viewpoint, and the falls run most powerfully in spring.
The endless switchbacks are best tackled on a cool morning to beat the heat on the exposed rock. Stay back from the wet edges near the top, where the granite is slick and the drop is sheer.
What to Pack for Yosemite
Because the best hiking Yosemite routes span slick waterfall stairs, exposed granite, and cool high country, layered clothing and solid footwear are key. Here are the essentials, with reliable picks available on Amazon.
| Gear | Why You Need It |
|---|---|
| Grippy hiking shoes | Traction on wet granite and steep stairs |
| Layered clothing | Warm valleys, cool summits, sudden storms |
| Trekking poles | Stability and knee relief on big descents |
| Hiking daypack | Haul water, food, and layers all day |
| Headlamp | Dawn starts and after-dark finishes |
Footwear and Layers
A grippy hiking shoe like the Salomon X Ultra or Merrell Moab handles the park’s slick granite, and a packable layering system, from a moisture-wicking base to a light insulated layer and a rain shell, covers the swing from hot valley floors to cool, breezy summits. Weather changes fast, so never skip the shell. A buff or neck gaiter is a versatile extra for sun, wind, and dust.
Support and Carry
Trekking poles such as the Cascade Mountain Tech carbon set steady you on descents and river-slick steps, and a comfortable daypack like the Osprey Talon 22 carries your water, food, and layers. On strenuous routes, a hydration reservoir makes sipping on the move easy. Pack calorie-dense snacks too, since big-climb days burn far more energy than you’d expect.
Hydration and Light
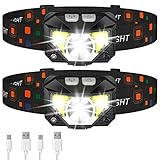
An insulated bottle like a Hydro Flask keeps water cold on long exposed climbs, and a headlamp such as the Black Diamond Spot is essential for Half Dome’s pre-dawn start. Add sunscreen and a wide-brim hat for the many shadeless miles. Trekking gloves for the cables and a small first-aid kit round out the big-summit essentials.
Frequently Asked Questions
A few questions come up again and again when planning the best hiking Yosemite trip. Here are quick, practical answers.
What’s the best season for hiking in Yosemite?
Spring brings roaring waterfalls, summer and early fall open the high country once Tioga and Glacier Point Roads clear, and fall offers quieter trails. Summer is busiest and hottest, so start early and reserve entry if required.
Which trail is best for beginners?
Mirror Lake, Lower Yosemite Fall, and Sentinel Dome are the easiest, delivering iconic views with little climbing. They’re ideal for families and first-time hikers who want scenery without a strenuous effort. For an easy day, these are the best hiking Yosemite choices.
Do I need a permit or reservation?
Half Dome requires a lottery permit, and the park often requires a timed entry reservation in peak season. Most day hikes don’t need a permit, but always confirm current park requirements before you go.
How should I prepare for altitude?
High-country trailheads sit above 8,000 feet, so hydrate well, pace yourself, and give your body a day to adjust if you can. Watch for headaches or nausea, and descend if symptoms worsen. Carrying extra water and easy snacks helps your body cope with the thinner mountain air.
See More:
- Best daypacks for hiking
- Best hiking sneakers men
- Best backpack for hike
- Best backpack for carry on
- Best travel backpack for men
Final Thoughts
The best hiking Yosemite trip is the one matched to your fitness and the season, from an easy Mirror Lake stroll to a strenuous Half Dome summit. Sort your route by difficulty, pack grippy shoes, layers, poles, and a headlamp, and check permits and road openings — and Yosemite will reward you with unforgettable scenery.






Write Your Review
No reviews yet. Be the first to share your experience!