Key takeaways
- Municipal faucet: Use a filter and pressure regulator. Household water pressure can be too high for small emitters and connectors.
- Rain barrel: Gravity systems may provide only a few tenths of a psi per foot of elevation. Use low-pressure emitters and keep lines short, or add a pump designed for irrigation.
- Well or pump system: Confirm that the pump can maintain pressure while the zone is operating. A pressure regulator protects the drip components but cannot compensate for inadequate supply.
- Long runs: Keep 1/4-inch tubing for short branches. Use 1/2-inch tubing as the mainline to reduce friction loss and improve uniformity.
on kits are the ones that match your garden’s longest tubing run, number of watering points, and available water pressure—not simply the kit with the most parts. For small containers, choose a low-flow micro-drip set; for raised beds, look for 1/2-inch mainline tubing and expandable 1/4-inch branch lines; for larger plots, buy a configurable system with a filter, pressure regulator, and reliable fittings.
Best drip irrigation kits by garden situation
| Garden situation | Best kit type | Useful starting specification | Why it fits |
|---|---|---|---|
| 4–12 containers on a patio | Micro-drip container kit | 25–50 ft of 1/4-inch tubing; 10–20 adjustable emitters | Easy to route and tune around individual pots |
| One 4 x 8 ft raised bed | Raised-bed drip kit | 50–100 ft of 1/2-inch mainline; 20–40 emitters or 2–4 drip lines | Provides even coverage with room for seasonal changes |
| Several beds or a 500–1,000 sq. ft. garden | Expandable 1/2-inch system | 100–500 ft mainline; filter, regulator, shutoff valves, and flush ends | Supports zones and future expansion without replacing the core system |
| Low-pressure rain barrel or gravity tank | Low-pressure micro-irrigation kit | Adjustable emitters; short runs; minimal elevation change | Standard pressure-compensating systems may not open or distribute evenly |
Our picks for the best drip irrigation kits
Best overall: an expandable 1/2-inch kit with a filter and regulator
For most raised beds and mixed vegetable gardens, the best choice is a modular kit built around 1/2-inch poly tubing. Look for at least 50 feet of mainline tubing, a 120-mesh filter, a pressure regulator set around 20–25 psi, several barbed tees and elbows, and removable end caps for flushing.

Rain Bird DRIPKITBAG Drip Irrigation Kit
Included for 'Best Drip Irrigation Kits for Gardens, Raised Beds, and Containers' as a relevant option in this category; details come from the product listing.
View on Amazon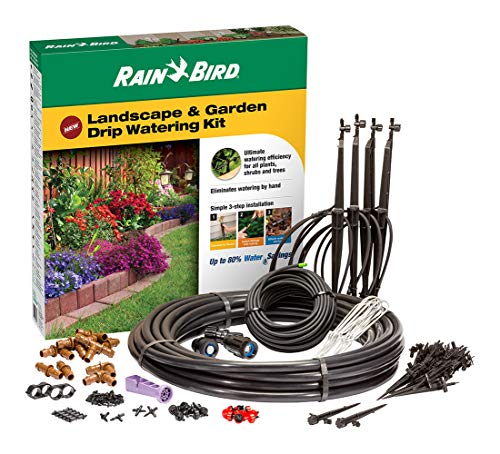
Rain Bird LNDDRIPKIT Drip Irrigation Kit
Included for 'Best Drip Irrigation Kits for Gardens, Raised Beds, and Containers' as a relevant option in this category; details come from the product listing.
View on Amazon
MIXC 230FT Quick-Connect Drip Irrigation System Kit, Automatic Garden Watering System with 1/4" & 1/2" Fast-Lock Tubing - Adjustable Nozzles & Sprinklers for Garden, Greenhouse, Lawn, Potted Plants
Included for 'Best Drip Irrigation Kits for Gardens, Raised Beds, and Containers' because the listing specifies Adjustable Nozzles & Sprinklers for Garden and Greenhouse, details this guide uses to compare options.
View on Amazon
Bonviee Drip Irrigation System Kit for Garden Watering, 230FT Quick Connect
Included for 'Best Drip Irrigation Kits for Gardens, Raised Beds, and Containers' because the listing specifies 230FT Quick Connect, details this guide uses to compare options.
View on AmazonRain Bird, Orbit, and Drip Depot all offer components and kits in this general format. The exact contents vary, so compare the included filter and regulator rather than judging by the advertised tubing length alone. A kit with 100 feet of tubing but no pressure control can be less useful than a 50-foot kit with the correct fittings.
This layout is expandable: run the mainline along the edge of a bed, then attach 1/4-inch feeder tubing or connect dripline directly. Add a valve for each bed if plants have different watering needs.
Best for containers: a micro-drip kit with adjustable emitters
Container gardens benefit from adjustable 1/4-inch emitters because a basil pot, tomato grow bag, and small herb container rarely need identical flow. A practical kit should include 25–50 feet of 1/4-inch distribution tubing, at least 10 stakes, and 10–20 adjustable emitters.
Gardena Micro-Drip, Orbit container irrigation products, and Rain Bird patio watering components are examples of established systems in this category. Choose a kit with sturdy tubing connectors and emitter stakes that can be removed for cleaning. Button emitters pushed directly into thin tubing are convenient, but they can pull out if the tubing is moved repeatedly.
For containers on a balcony, place the pressure regulator close to the faucet and keep the run short. If the system is supplied by a pump or elevated tank, verify that the kit is designed for that pressure range.
Best for raised beds: a kit built around dripline
Dripline is usually simpler than installing one emitter per plant in a regular raised bed. A typical 1/2-inch dripline has emitters spaced 6, 9, or 12 inches apart. For closely planted vegetables, 6- or 9-inch spacing gives more uniform wetting; 12-inch spacing suits larger plants or rows with wider spacing.
For a 4 x 8 foot bed, two to four parallel runs are common. Leave enough room between lines for the soil type: sandy soil generally needs closer spacing, while loam spreads moisture farther sideways. Heavy clay can require wider spacing but shorter watering periods to avoid puddling.
Use a header connection at one end and a flush cap at the other. Avoid burying the tubing until you have run the system for several watering cycles and confirmed that every line is flowing.
Best for a large or changing garden: a configurable Drip Depot-style system
When the layout changes from year to year, buy components by specification rather than a fixed all-in-one bundle. A configurable system lets you select mainline length, dripline spacing, pressure regulation, filter size, and zone valves separately.
This approach costs more initially—often about $60–$150 for a well-equipped small garden system—but reduces wasted parts. It also makes repairs easier because replacement connectors, tubing, filters, and emitters are widely available in standard sizes.
How much tubing and how many emitters do you need?
Measure the actual route, not the area of the garden. Add the length from the faucet to the bed, the distance along the bed edge, and each branch line. Then add 10–20 percent for curves, mistakes, and future adjustments.
For example, suppose a raised bed needs 4 dripline rows, each 8 feet long. The rows require 32 feet of dripline. Add 10 feet from the faucet and 8 feet for the header, giving 50 feet total. With 20 percent spare capacity, choose approximately 60 feet of tubing. A 50-foot kit will be tight; a 100-foot kit gives useful room for rerouting.
If you use individual 1-gallon-per-hour emitters for 24 plants, the garden’s nominal flow is 24 gallons per hour, or 0.4 gallons per minute. That is a modest demand for a household faucet, but the effective flow can fall if the run is long, the filter is clogged, or several zones operate at once.
Pressure and water-source requirements
- Municipal faucet: Use a filter and pressure regulator. Household water pressure can be too high for small emitters and connectors.
- Rain barrel: Gravity systems may provide only a few tenths of a psi per foot of elevation. Use low-pressure emitters and keep lines short, or add a pump designed for irrigation.
- Well or pump system: Confirm that the pump can maintain pressure while the zone is operating. A pressure regulator protects the drip components but cannot compensate for inadequate supply.
- Long runs: Keep 1/4-inch tubing for short branches. Use 1/2-inch tubing as the mainline to reduce friction loss and improve uniformity.
A useful rule is to design one zone around the available flow. Add the flow ratings of all emitters that will run together, then stay below roughly 70–80 percent of the water source’s measured flow. This leaves a margin for filter loading and pressure loss.
What to look for before buying
Included parts
The minimum useful package is more than tubing and emitters. Prioritize a filter, regulator, faucet adapter, mainline shutoff, end caps, stakes, and enough connectors for the planned branches. Spare barbed connectors are worthwhile because fittings are easy to lose and difficult to reuse after tubing has been cut.
Emitter style
Adjustable emitters are flexible for containers but require occasional tuning. Fixed-flow emitters are more predictable when every plant has similar needs. Pressure-compensating emitters are preferable on long or uneven runs because they maintain a more consistent output across a wider pressure range.
Expandability
Check whether the kit uses common 1/2-inch and 1/4-inch fittings. Proprietary connectors can make expansion expensive or force you to replace the entire system. A kit with spare outlet ports, zone valves, and removable end caps is easier to grow with.
Setup and maintenance that prevent common failures
- Attach the filter first, then the pressure regulator, followed by the tubing. This order keeps debris and excessive pressure away from the emitters.
- Lay out the tubing in the sun for several minutes so it softens and straightens. Do not sharply kink cold poly tubing.
- Flush the mainline before installing emitters or closing the ends. Manufacturing debris can clog small passages immediately.
- Run the system and inspect every connection. A small leak at the faucet can reduce pressure throughout a long bed.
- Water deeply enough to wet the root zone, then adjust frequency according to soil, weather, and plant size rather than leaving the system on a fixed schedule.
- At the end of the season, remove filters, drain the lines, and store detachable components where freezing cannot damage them.
The filter is usually the first consumable to need attention, especially with rainwater or an old outdoor faucet. Emitters can clog, stakes can loosen, and thin 1/4-inch tubing becomes brittle after prolonged sun exposure. Keep spare emitters and connectors on hand, and replace cracked sections instead of trying to seal them permanently with tape.
Final buying recommendation
Choose a small adjustable-emitter kit for containers, a 1/2-inch dripline kit for one or two regular raised beds, and a configurable filtered system with separate zones for a larger or changing garden. Before ordering, calculate the longest run, total emitter flow, and required tubing length. Those three figures will tell you more about the best drip irrigation kits for your layout than the part count printed on the package.