Key takeaways
- Using contaminated backflush water: You may push additional microbes and sediment into the filter.
- Flushing in the wrong direction: Follow the arrow or manual. Improper flow can reduce cleaning effectiveness or damage the unit.
- Applying excessive pressure: A gentle, repeated flush is safer than forcing a stuck plunger.
- Using hot or boiling water: Heat can deform the housing or harm the filter media.
- Scrubbing the membrane: Clean the exterior only; never insert tools into the ports.
- Storing it wet and sealed: Trapped moisture can create unpleasant odors and encourage growth.
- Freezing a wet filter: Assume internal water remains unless the filter has been fully dried according to its instructions.
- Ignoring the bladder: A dirty reservoir can recontaminate a clean filter outlet or make clean water taste stale.
A backpacking water filter can slow to a trickle when sediment, algae, and organic matter clog its microscopic pores. Cleaning it the wrong way can be just as troublesome: forcing water in the wrong direction may damage the filter, while storing a wet filter can allow odors or biological growth to develop. A neglected filter may also leave you waiting longer at camp or tempt you to drink untreated water.
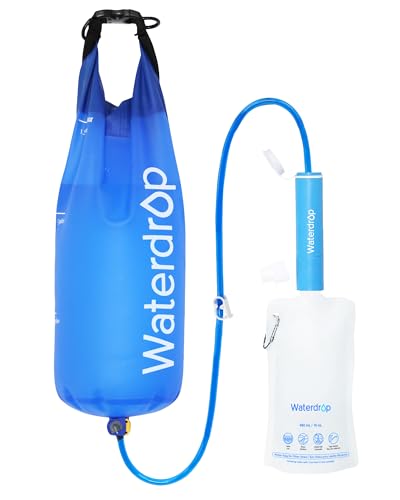
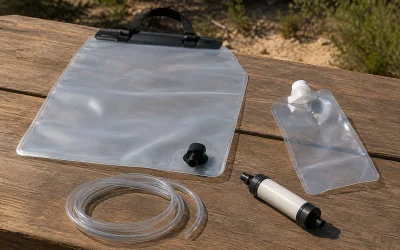
The good news is that most squeeze-style hollow-fiber filters are designed to be cleaned in the field. The basic process is to backflush the filter with clean water, rinse away loosened debris, sanitize it when appropriate, and dry it fully before long-term storage. Always check the instructions for your exact model, since flow directions, cleaning solutions, and storage recommendations can vary. The steps below suit common backpacking filters such as the Sawyer Squeeze and Sawyer Mini, including setups paired with a two-liter squeeze bladder.
Our top picks

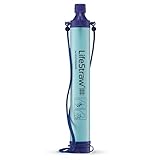
 Sawyer Products SP128 Mini Water Filtration System
- Product Group: Outdoors
- Binding: Sports
As an Amazon Associate we earn from qualifying purchases at no extra cost to you. Ratings are shown as listed on Amazon.
What You Need
| Item | Why | Optional? |
|---|---|---|
| Clean water | Flushes sediment and residue from the filter. Use treated, potable, or otherwise reliably clean water. | No |
| Backflush syringe or compatible squeeze bottle | Pushes water backward through the filter, which is the most important cleaning action. | No, unless your filter manufacturer permits another method |
| Unscented household bleach | Useful for occasional sanitizing before storage when the manufacturer’s instructions allow it. | Yes |
| Small bowl or sink | Catches cloudy rinse water and makes cleaning less messy. | Yes |
| Soft cloth or paper towel | Wipes the exterior, threads, cap, and seals. | Yes |
| Compatible replacement O-rings or caps | Restores a seal if a gasket is cracked, stretched, or missing. | Yes |
A Sawyer Squeeze Water Filtration System paired with a Cnoc Premium 2 Liter Bladder is a typical high-volume squeeze setup, with a listed combined product price reference of about $65 for the filter system listing. A compact Sawyer Mini is commonly priced around $29. Prices vary by retailer and package, but replacement parts are usually less expensive than replacing an entire kit.
Step-by-Step
1. Separate and inspect the filter — 3 minutes
Empty the dirty-water bladder and disconnect it from the filter. Remove any clean-water bottle, hose, or adapter. Check the filter body, end caps, threads, gasket, and hose connections for cracks, distortion, or leaks.
Look inside the caps for grit or plant debris. Rinse loose dirt from the outside, but do not use a stiff brush on the filter’s ports or fiber membrane. If the filter is cracked, leaking from its body, or visibly damaged, cleaning may not make it safe to use.
2. Rinse the outside and accessories — 2 minutes
Wash the bladder, cap, hose, and adapters with clean water. If the bladder has an odor or visible film, use a small amount of mild, unscented dish soap followed by several thorough rinses. Keep soap out of the filter unless its manufacturer specifically permits soap cleaning.
Pay particular attention to threads and O-rings. Grit in these areas can prevent a watertight connection or make a cap difficult to open. Do not lubricate seals with petroleum jelly, which can degrade some rubber and plastic parts.
3. Prepare clean water for backflushing — 1 minute
Use water you would be comfortable drinking after normal treatment. If you have only questionable water available, treat or boil it first, then let it cool completely. Do not backflush with boiling water. Very hot water can damage filter materials and may deform plastic components.
Fill a clean syringe or compatible squeeze container. Follow the arrows on the filter body or the manufacturer’s diagram so you know which end is the backflush inlet. Backflushing means sending water opposite the normal direction of filtration.
4. Backflush the filter — 5 to 10 minutes
Attach the syringe or bottle firmly to the correct port. Hold the filter over a sink, bowl, or bare ground where cloudy water can drain safely. Push water through with steady, moderate pressure. Do not slam the plunger or squeeze so forcefully that the housing flexes.
Repeat several times. The first flush may release gray, brown, or greenish particles, especially if the filter processed silty water. Continue until the discharged water is substantially clearer and the flow improves. A filter that was exposed to heavy sediment may need many cycles rather than one large blast of water.
If your model’s instructions call for shaking or tapping between flushes, do so gently. Never poke into the filter ports with a wire, needle, or toothpick. Internal hollow fibers are delicate, and a puncture can allow untreated water through.
5. Rinse in the normal direction — 2 minutes
After backflushing, run clean water through the filter in its normal direction. This removes loosened particles that may remain near the outlet. Discard the first few ounces rather than drinking them, particularly if you used a cleaning or sanitizing solution.
Check the flow by filling a clean container. A slower rate immediately after filtering very silty water is expected; a filter that remains nearly blocked after repeated backflushing may be at the end of its usable life.
6. Sanitize for storage when appropriate — 5 to 10 minutes, plus drying time
For extended storage, some manufacturers permit a dilute solution of unscented household bleach. Follow the instructions for your filter first. A commonly used starting ratio is about one teaspoon of regular, unscented bleach per one liter of clean water, but bleach strengths and product directions vary.
Run the approved solution through the filter in the normal direction, let it sit only for the time specified by the manufacturer, and then flush thoroughly with clean water. Do not mix bleach with vinegar, ammonia, soap, or another cleaner. Sanitizing is not a substitute for backflushing; disinfectant does not remove trapped sediment.
7. Dry and store the filter — 24 to 72 hours
Drain as much water as possible. Place the filter in a clean, dry, ventilated location with its ports open. Allow it to dry completely before sealing it in a bag or gear bin. Depending on humidity and the filter’s internal design, drying can take one to three days.
Store the dry filter where it will not freeze. Water trapped inside can expand when frozen and damage the filter fibers. Keep caps nearby but loose or off during drying, then reinstall them once the filter is fully dry. Label a filter that has been used with untreated water so nobody mistakes it for a clean household water component.
Mistakes to Avoid
- Using contaminated backflush water: You may push additional microbes and sediment into the filter.
- Flushing in the wrong direction: Follow the arrow or manual. Improper flow can reduce cleaning effectiveness or damage the unit.
- Applying excessive pressure: A gentle, repeated flush is safer than forcing a stuck plunger.
- Using hot or boiling water: Heat can deform the housing or harm the filter media.
- Scrubbing the membrane: Clean the exterior only; never insert tools into the ports.
- Storing it wet and sealed: Trapped moisture can create unpleasant odors and encourage growth.
- Freezing a wet filter: Assume internal water remains unless the filter has been fully dried according to its instructions.
- Ignoring the bladder: A dirty reservoir can recontaminate a clean filter outlet or make clean water taste stale.
How Often
Backflush whenever flow noticeably slows, after filtering visibly cloudy water, and at the end of a trip if the filter handled substantial sediment. For frequent hikers, inspect and clean the filter after every trip rather than waiting for a performance problem.
Sanitize before long-term storage when the manufacturer recommends it, then dry the filter completely. A quick exterior rinse and inspection should happen each time you pack. Replace or clean the bladder and caps as often as needed to prevent film, odor, or visible residue.
When to Call a Pro or Replace
Most backpacking water filters are not practical to repair internally. Replace the filter if its housing is cracked, if water leaks from the body, if a seal cannot be restored, or if it still has extremely poor flow after careful backflushing.
Also replace it if you suspect the filter froze while wet, was dropped hard, or was exposed to chemicals or heat outside the manufacturer’s limits. Do not rely on taste, smell, or improved flow to confirm that a damaged filter removes microorganisms. If you cannot verify its condition, use a new filter or another reliable treatment method.
FAQ
Can I clean a backpacking water filter with dish soap?
Use mild soap on the bladder, caps, and exterior accessories only unless the filter manufacturer explicitly approves soap inside the filter. Soap residue can be difficult to rinse out and may affect taste or filter materials. Backflushing with clean water is the primary cleaning method.
How do I know whether backflushing worked?
Discharged water should become clearer, and the filter should process water more easily. A visual improvement does not prove the filter is undamaged or microbiologically safe, however. If flow remains extremely slow or the housing leaks, replace the filter.
Can I use a water bottle instead of a syringe?
Only if the bottle, cap, and connection are compatible and the manufacturer permits that method. The key is controlled reverse flow without excessive pressure. An improvised connection that leaks or directs water through the wrong port may not clean the filter effectively.
What should I do if my filter freezes?
Assume it may be damaged if it froze while wet. Internal water can expand and create cracks that are invisible from the outside. Do not trust normal flow or clear-looking water; replace the filter or use a verified backup treatment method.