Key takeaways
- 2 1/4 cups (280 g) plain or all-purpose flour
- 2 teaspoons baking powder
- 1/2 teaspoon baking soda
- 1/2 teaspoon fine salt
- 3/4 cup (170 g) unsalted butter, softened
- 1 1/2 cups (300 g) granulated sugar
- 3 large eggs, room temperature
- 2 teaspoons vanilla extract
- 1 cup (240 ml) buttermilk
This leo birthday cake recipe makes a two-layer, 8-inch lion-themed cake that serves 12–16 people and can be assembled in about 90 minutes, including cooling and decorating time.
What You’ll Make
The design uses a round cake as the lion’s face, a piped or sliced-candy mane, and simple fondant or chocolate details for the eyes, nose, and whiskers. A sturdy butter cake or chocolate cake works best because it travels more reliably than a very light sponge, especially if the celebration is at a park, campsite, or picnic table.

Leo Cake Toppers,Acrylic Gold Leo Energy/Leo Season Cake Decor,July August Birthday Cupcake Decoration,Horoscope Astrology Birthday Party Supplies
Included for 'Leo Birthday Cake Recipe: Easy Lion-Themed Cake' because the listing specifies Acrylic Gold Leo Energy/Leo Season Cake Decor and July August Birthday Cupcake Decoration, details this guide uses to compare options.
View on Amazon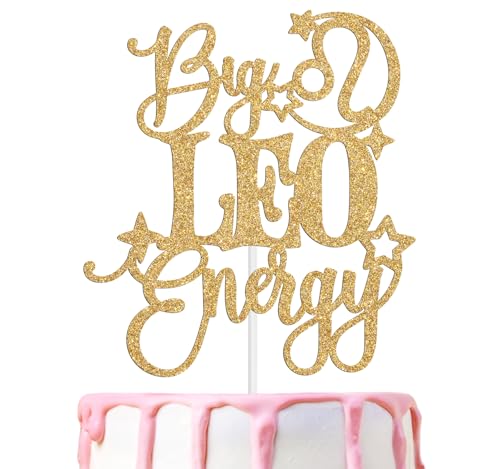
Big Leo Energy Cake Topper, Happy Birthday Leo in July/August, Leo Season, 12 Zodiac Constellation Theme Birthday Party Decoration Supplies, Gold Glitter
Included for 'Leo Birthday Cake Recipe: Easy Lion-Themed Cake' because the listing specifies Happy Birthday Leo in July/August and Leo Season, details this guide uses to compare options.
View on Amazon
Leo Symbol Sign Cake Topper, Acrylic Gold Zodiac Constellation Leo Theme Cake Side Decoration, July August Birthday Cake Charm Decor for Horoscope Astrology Birthday Cupcake Toppers Party Supplies
Included for 'Leo Birthday Cake Recipe: Easy Lion-Themed Cake' as a relevant option in this category; details come from the product listing.
View on Amazon| Specification | Recommended choice |
|---|---|
| Cake pan | Two 8-inch round pans, each 2 inches deep |
| Finished height | About 4 inches before mane decoration |
| Servings | 12 generous or 16 smaller party slices |
| Bake temperature | 350°F (175°C), or 325°F (165°C) for a fan oven |
| Approximate bake time | 27–34 minutes |
| Decoration time | 30–45 minutes |
| Outdoor transport | Chilled cake in a rigid carrier with two ice packs |
Ingredients
For the cake
- 2 1/4 cups (280 g) plain or all-purpose flour
- 2 teaspoons baking powder
- 1/2 teaspoon baking soda
- 1/2 teaspoon fine salt
- 3/4 cup (170 g) unsalted butter, softened
- 1 1/2 cups (300 g) granulated sugar
- 3 large eggs, room temperature
- 2 teaspoons vanilla extract
- 1 cup (240 ml) buttermilk
For a chocolate version, replace 1/3 cup (40 g) of the flour with unsweetened cocoa powder and add 2 tablespoons of milk if the batter seems unusually thick. You can also use a boxed cake mix, but fill each pan only about two-thirds full to prevent overflow.
For the frosting and lion details
- 6 cups (about 690 g) powdered sugar
- 1 1/2 cups (340 g) unsalted butter, softened
- 2–4 tablespoons milk or cream
- 2 teaspoons vanilla extract
- Yellow gel food coloring
- Orange, golden brown, or dark brown gel food coloring
- 1 cup of golden-yellow frosting for the face
- 2–3 cups of orange-brown frosting for the mane
- Black and white fondant, or small amounts of melted chocolate, for facial features
- Optional: chocolate chips, edible candy eyes, or yellow and orange sprinkles
Prepare the Cake Layers
- Heat the oven to 350°F (175°C). Grease two 8-inch round pans, line their bases with parchment, and lightly flour the sides.
- Whisk together the flour, baking powder, baking soda, and salt.
- Beat the butter and sugar for 3–4 minutes, until pale and fluffy. Add the eggs one at a time, then mix in the vanilla.
- Add the dry ingredients in three additions, alternating with the buttermilk. Mix only until no dry streaks remain.
- Divide the batter evenly between the pans. For more even layers, weigh the batter; each pan will usually receive approximately 600–650 g, depending on the exact ingredients.
- Bake for 27–34 minutes, until the centers spring back and a skewer comes out with a few moist crumbs.
- Cool in the pans for 10 minutes, then turn the layers onto a rack. Let them cool completely before frosting.
Do not decorate warm cake. Heat softens buttercream and can make the lion’s mane slide or lose its shape. If you are working ahead, wrap the cooled layers in plastic wrap and refrigerate them for up to 24 hours.
Make the Buttercream
Beat the butter for 2–3 minutes. Add the powdered sugar gradually, then mix in the vanilla and enough milk or cream to create a smooth, spreadable consistency. Beat for another 3 minutes, scraping the bowl once or twice.
Reserve approximately 1 cup of plain frosting and tint it golden yellow for the lion’s face. Tint most of the remaining frosting orange-brown. For a more dimensional mane, divide the mane frosting into two bowls and make one slightly darker than the other.
The face frosting should be soft enough to spread smoothly. The mane frosting needs to be firmer so piped ridges hold their shape. If it droops, refrigerate it for 10–15 minutes; if it is too stiff, mix in milk one teaspoon at a time.
Assemble the Lion Cake
- Trim the domed tops from the cake layers if necessary. Place one layer on a cake board or flat serving plate.
- Spread 3/4–1 cup of frosting over the first layer, keeping it level to avoid a leaning cake.
- Place the second layer on top with the cut side down. Apply a thin crumb coat over the top and sides.
- Chill the cake for 20 minutes. This short chill makes the final decoration cleaner and reduces crumbs in the yellow face.
- Spread the yellow frosting over the top, creating a smooth 7-inch to 7 1/2-inch circle. Leave a border for the mane.
- Pipe the orange-brown frosting around the edge in short zigzags, teardrops, or rosettes. Work from the outside toward the yellow face, forming a full mane approximately 1 1/2–2 inches wide.
- Add a second row in the darker frosting if desired. Alternate the direction of the piped tufts so the mane looks full rather than like a flat ring.
- Shape two small rounded ears from brown fondant, or pipe two semicircles of frosting at the upper left and right edges of the face.
- Add white or pale-yellow fondant eyes, then place smaller black fondant pupils. Make the nose a rounded black or dark-brown triangle.
- Pipe a small mouth beneath the nose and add six short whiskers on each side using dark frosting or thin chocolate lines.
Decoration Choices by Skill, Budget, and Location
| Situation | Best decoration approach | Time needed | Trade-off |
|---|---|---|---|
| First decorated cake | Smooth yellow frosting with candy eyes and a piped border | 25–30 minutes | Most forgiving, but less detailed |
| Limited budget | Two frosting colors and homemade chocolate facial lines | 30–35 minutes | Uses pantry ingredients instead of specialty decorations |
| Indoor party with time to spare | Two-tone piped mane plus fondant ears and muzzle | 40–50 minutes | More polished, but requires firmer frosting |
| Outdoor or picnic party | Flat frosting design, minimal fondant, chilled cake carrier | 25–35 minutes | Better stability in transport and warm weather |
| Large guest list | Two 9-inch layers or a rectangular sheet cake with lion decorations | Similar decorating time | More servings but a less compact lion face |
Serving and Transport Calculations
An 8-inch round cake has approximately 50 square inches of surface area. If it is cut into 12 party slices, each slice represents about 4 square inches of cake; cutting it into 16 pieces produces smaller portions of roughly 3 square inches each. For a mixed group of children and adults, plan on one 16th-size piece per person plus 10–15% extra. That means one 8-inch cake is suitable for 14–16 guests, while a group of 20 should have a second small dessert or a larger 9-inch cake.
For an outdoor event, chill the finished cake for at least 2 hours before leaving. Place it on a nonslip mat inside a rigid cake carrier and use two frozen ice packs around, not directly against, the carrier. Keep it shaded and serve within 2 hours if the weather is warm. Buttercream softens before it becomes visibly melted, so avoid carrying the cake in a hot car or leaving it in direct sun.
Timeline for a Low-Stress Bake
| When | Task |
|---|---|
| Day before | Bake and cool the layers; wrap and refrigerate them. |
| 3 hours before serving | Make the buttercream and assemble the layers. |
| 2 hours before serving | Finish the mane and face; refrigerate the cake. |
| 45–60 minutes before serving | Place the cake in its carrier and transport it in a cool vehicle. |
| At serving time | Let the cake stand for 15–20 minutes, then slice with a warm, clean knife. |
Common Mistakes to Avoid
- Uneven layers: Weigh the batter or measure it with a large scoop so the two cakes bake at the same rate.
- A sliding mane: Chill the crumb-coated cake and use firm buttercream rather than whipped cream.
- Overly sweet decoration: Keep the facial features small and use a less-sweet cake flavor, such as chocolate or lemon, for balance.
- Crumbs in the face: Apply a thin crumb coat before the final yellow layer and use a clean spatula.
- Dry cake: Start checking several minutes before the recipe’s maximum bake time. Overbaking is the most common cause of dry layers.
- Messy outdoor slicing: Bring a serrated knife, a small offset spatula, napkins, and a sealable container for leftovers.
How Long It Keeps
Covered cake keeps at room temperature for up to 24 hours in a cool room. Refrigerated, it is usually at its best for 3 days, although the cake may firm up and the decorations may lose some freshness. Store leftovers in an airtight container, and let them sit at room temperature for 20–30 minutes before serving.