Key takeaways
- Mixing old and new batteries: A weak cell can reduce the output of the entire set and may be more likely to leak.
- Mixing battery types: Do not combine alkaline, lithium, and NiMH cells in one compartment unless the manufacturer specifically allows it.
- Reversing one battery: One incorrectly oriented cell can stop the lamp from working and may stress the circuit.
- Using a damaged cell: Do not install batteries that are swollen, dented, rusty, or leaking.
- Forcing the cover: Check for a hidden screw or latch before applying pressure.
- Ignoring water: Dry the compartment completely before inserting batteries, especially after rain or washing the headlamp.
- Leaving batteries inside for months: Remove them before long-term storage to reduce the risk of leakage.
- Testing brightness by staring into the LEDs: Aim the lamp at a wall or floor instead. High-output lights can be uncomfortable or harmful to look at directly.
Learning how to change headlamp batteries takes only a few minutes, but installing them incorrectly can leave you in the dark at the worst possible time. Reversed batteries may prevent the light from turning on, while mixing old and new cells can cause weak output or leakage. Forcing the battery door can also crack a latch or damage the water-resistant seal.
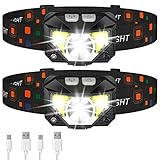
Most compact headlamps use three AAA batteries, although some models use two, four, or a rechargeable battery pack. Before opening the housing, check the markings inside the compartment or the instructions that came with your light. The process below works for many battery-powered headlamps, including common six-AAA two-pack sets such as the Eirnvop and Lsnisni 9 LED models, which are listed at about $16.99 per two-pack and include six AAA batteries.
As an Amazon Associate we earn from qualifying purchases at no extra cost to you. Product prices and availability are accurate as of the date shown and are subject to change.


What You Need
| Item | Why | Optional? |
|---|---|---|
| Correct replacement batteries | Most headlamps use AAA alkaline or rechargeable NiMH cells. Confirm the size and quantity printed in the battery compartment. | No |
| Small, clean cloth | Wipes dirt and moisture from the battery door and contacts. | Yes |
| Cotton swab | Helps clean light residue from narrow metal contacts. | Yes |
| Gloves | Protects your hands if an old battery has leaked. | Yes |
| Small flashlight | Useful if you are changing batteries in a dark campsite, vehicle, or utility area. | Yes |
Choose batteries made for the headlamp’s voltage and compartment. Standard alkaline AAA batteries are widely available and usually cost about $5 to $12 for a multipack. Rechargeable AAA NiMH batteries commonly cost $10 to $20 for a four-pack, plus the cost of a compatible charger. Do not combine alkaline cells with rechargeable cells, or mix batteries with different charge levels.
Step-by-Step
1. Turn the headlamp off and remove it from your head (1 minute)
Press the power button until the light is off. If the headlamp has multiple modes, press the button slowly so you do not accidentally leave it on its lowest setting. Remove the lamp from your head or helmet and place it on a dry, stable surface.
If the lamp was running recently, wait a few minutes for the housing to cool. Bright LED headlamps can become warm around the front lens and battery compartment, even though the LEDs use relatively little power compared with older incandescent lights.
2. Find the battery compartment (1 minute)
Look for the battery door on the front lamp body, rear battery pack, or an attached side housing. Some headlamps open with a sliding cover. Others use a hinged door secured by a latch, screw, or rubber plug.
Check for an arrow, battery icon, tab, or small recessed notch. Do not pry against the LED lens, circuit board, or elastic headband. If the door has a screw, use the correct screwdriver and set the screw aside where it cannot roll away.
3. Open the compartment carefully (1 to 2 minutes)
Release the latch with your fingertip or a plastic edge, such as an old gift card. Avoid using a knife or metal screwdriver to lever against the housing, because a slip can damage the waterproofing or puncture the battery.
For a rubberized battery cover, peel the edge back slowly rather than pulling on the center. Look for a thin gasket or O-ring around the door. This seal helps keep out splashes, and losing it may reduce the headlamp’s water resistance.
4. Remove the old batteries (1 minute)
Note how each battery is positioned before removing it. Take a quick photo if the polarity symbols are hard to see. Press the battery toward the spring end first, then lift the opposite end out. This is easier and places less stress on the contacts.
Inspect the cells for swelling, dents, rust, or white, crusty, or wet residue. If a battery has leaked, put on gloves, remove it without touching your face, and place it in a sealed plastic bag. Do not use a leaking battery again. Follow local rules for battery recycling or household hazardous-waste disposal.
5. Check and clean the contacts (1 to 2 minutes)
Look inside the compartment for bent springs, green or white residue, dark corrosion, or moisture. Wipe ordinary dust with a dry cloth or cotton swab. If the contacts are wet, leave the compartment open until it is completely dry.
Do not scrape aggressively or pour liquid into the housing. Severe corrosion can prevent reliable contact and may indicate that the headlamp should be replaced. Never apply oil or household lubricant to the terminals.
6. Insert the new batteries in the correct direction (1 to 2 minutes)
Match the positive and negative ends to the diagrams molded into the compartment. The raised nub is the positive end; the flat end is negative. In many compartments, the spring touches the negative end, but always follow the printed symbols rather than assuming the layout.
Install every battery in the same replacement session. Use the same brand and chemistry when possible, and make sure all cells are the same size. Do not force a battery into a space that seems too tight. A properly installed cell should sit flat without bulging or pressing hard against the door.
7. Close the door and test every mode (1 to 2 minutes)
Before closing the compartment, confirm that no wire, gasket, or battery wrapper is pinched. Refit the door evenly and secure the latch or screw without overtightening. A screw that is too tight can strip plastic; a loose door can open while you are walking or running.
Turn the headlamp on and cycle through its brightness and flashing modes. Check that the light starts promptly, does not flicker when you gently move the housing, and remains on for at least 30 seconds. If it does not work, turn it off and recheck polarity, battery size, and contact alignment.
Mistakes to Avoid
- Mixing old and new batteries: A weak cell can reduce the output of the entire set and may be more likely to leak.
- Mixing battery types: Do not combine alkaline, lithium, and NiMH cells in one compartment unless the manufacturer specifically allows it.
- Reversing one battery: One incorrectly oriented cell can stop the lamp from working and may stress the circuit.
- Using a damaged cell: Do not install batteries that are swollen, dented, rusty, or leaking.
- Forcing the cover: Check for a hidden screw or latch before applying pressure.
- Ignoring water: Dry the compartment completely before inserting batteries, especially after rain or washing the headlamp.
- Leaving batteries inside for months: Remove them before long-term storage to reduce the risk of leakage.
- Testing brightness by staring into the LEDs: Aim the lamp at a wall or floor instead. High-output lights can be uncomfortable or harmful to look at directly.
How Often
Change batteries when the beam becomes noticeably dimmer, the lamp flickers, or it shuts off under normal use. For occasional household or camping use, a fresh alkaline set may last several hours to dozens of hours depending on brightness and battery capacity. High-output modes consume energy faster than low or red-light modes, so runtime varies substantially by model and setting.
Check stored headlamps every three to six months. Open the compartment, look for leakage, and confirm that the batteries are not past their expiration date. If you use a headlamp weekly, keep a spare set of batteries in a sealed bag or small case. Rechargeable NiMH cells are convenient for frequent use, but recharge them with the correct charger and replace them when runtime becomes impractical.
When to Call a Pro or Replace
Most inexpensive headlamps are not designed for professional repair. Replace the light if the battery compartment is cracked, the contacts are badly corroded, the door will not stay closed, or the lamp gets hot, smokes, smells chemical, or behaves erratically with fresh batteries.
Consider repair only when the headlamp is a specialized, expensive model with a replaceable gasket, removable battery pack, or manufacturer service program. Do not open a sealed rechargeable headlamp yourself. Lithium-ion cells can cause fire or injury if punctured, shorted, or installed incorrectly. For common two-pack headlamps priced around $15 to $25, replacement is usually more practical than paying for electrical troubleshooting.
FAQ
How do I know which batteries my headlamp needs?
Check the battery compartment, label, or user manual for the size, number, and chemistry. Many basic headlamps use AAA batteries, while larger lamps may use AA cells or a proprietary rechargeable pack. Never guess based only on the physical appearance of the lamp.
Why is my headlamp still not working after I changed the batteries?
Turn it off, remove the batteries, and verify the polarity symbols. Then check for a loose spring, corrosion, moisture, a misaligned door, or a battery that is not making contact. If the light still fails with a known-good set, the switch or circuit may be damaged.
Can I use rechargeable batteries in a battery headlamp?
Usually, yes, if the headlamp accepts that battery size and chemistry. Standard NiMH rechargeable cells typically have a lower nominal voltage than alkaline cells, so the light may be dimmer or may shut off sooner. Follow the manufacturer’s instructions and never recharge disposable batteries.
How should I store a headlamp between uses?
Turn it off, remove the batteries for storage longer than a few weeks, and keep the lamp in a cool, dry place. Store spare batteries in their original package or a battery case, away from keys, coins, and direct sunlight. Test the headlamp before every night hike, repair, or emergency use.