Key takeaways
- Cleaning while connected: Residual gas can ignite from a nearby spark or pilot light.
- Soaking the whole stove: Water can remain inside the regulator, valve, igniter, and burner passages.
- Using metal tools in ports: Enlarged openings can change the flame pattern and create a safety hazard.
- Reassembling while damp: Moisture can cause sputtering and delayed ignition.
- Ignoring the air intake: Spider webs, insects, and dirt around the mixing tube can restrict airflow.
- Testing indoors: Fuel-burning camping stoves produce carbon monoxide and should be used only outdoors, away from doors, windows, and vents.
- Spraying cleaner into the valve: Liquid or residue may damage seals and interfere with fuel flow.
A dirty camp stove burner can turn a dependable cooking setup into a frustrating one. Grease and food debris may clog the burner ports, create uneven flames, increase flare-ups, or cause delayed ignition. A poorly cleaned burner can also leave soot on cookware and waste propane or butane. The good news: most portable stove burners need only a few household supplies and about 20 to 30 minutes of hands-on work.
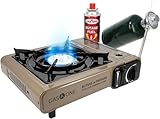
This method works for common propane, butane, and dual-fuel camping stoves, including compact tabletop models and high-pressure outdoor burners. Before cleaning, always shut off the fuel, disconnect the canister or cylinder, and let every part cool completely. For a stove you use in 2026, follow the manufacturer’s manual if it calls for a different cleaning method or prohibits removing a particular burner component.
As an Amazon Associate we earn from qualifying purchases at no extra cost to you. Product prices and availability are accurate as of the date shown and are subject to change.

What You Need
| Item | Why | Optional? |
|---|---|---|
| Warm water and a few drops of dish soap | Loosens grease, sauce, and carbon from removable parts | No |
| Nylon scrub brush or old toothbrush | Cleans burner openings without damaging the metal | No |
| Soft cloths or paper towels | Wipes the frame, grate, and exterior | No |
| Wooden toothpick | Gently lifts debris from clogged burner ports | Optional |
| Small bowl | Holds soapy water for soaking removable parts | Optional |
| Work gloves and safety glasses | Protect hands and eyes from grime and loosened particles | Optional |
| Leak-detection solution or soapy water | Checks fuel connections after reassembly | Optional but recommended |
A nylon brush is safer than a steel brush, which can scratch finishes and leave metal bristles behind. Do not use an oven cleaner, chlorine bleach, or abrasive powder on a portable burner. These products can damage coatings, seals, aluminum, and brass components.
Step-by-Step
1. Turn off and disconnect the fuel (5 minutes)
Move the stove outdoors or to a well-ventilated, nonflammable work area. Turn the control knob fully off, then close the valve on the propane cylinder or remove the butane canister according to the stove’s instructions. If the stove has a fuel hose, disconnect it only after the valve is closed.
Never clean a connected stove, even if you believe the fuel is empty. Keep cigarettes, candles, pilot lights, and other ignition sources at least several feet away. Wait until the grate and burner are cool to the touch.
2. Remove the grate, windscreen, and loose parts (3 minutes)
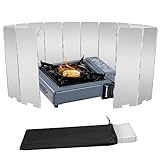
Lift off the cooking grate, pot supports, windscreen, drip tray, and burner cap if your model has one. Take a quick photo before removing parts if you are unsure how they fit back together. Do not force screws, clips, or burner heads that are not designed to come off.
Keep the regulator, fuel valve, ignition module, hose, and electrical components away from water. These parts should be wiped with a barely damp cloth only. Never immerse a regulator or fuel connection.
3. Brush away loose debris (2 minutes)
Turn removable burner parts upside down and use a dry nylon brush to dislodge crumbs, ash, and flakes of carbon. Brush around the burner ports and the air-intake area. A soft paintbrush can help remove fine debris from a compact burner without pushing it farther inside.
If grease is thick, scrape it gently with a plastic scraper or the edge of an old plastic card. Avoid knives and screwdrivers, which can gouge the metal or distort small openings.
4. Wash removable parts (10 minutes)
Place the grate, burner cap, drip tray, and other approved removable pieces in warm soapy water. Let greasy parts soak for 5 to 10 minutes, then scrub them with the nylon brush. Rinse thoroughly so soap does not burn onto the surface during the next use.
Do not soak the entire burner assembly unless the manufacturer specifically permits it. Many burners contain passages and fittings that can retain water. For a fixed burner, dip the brush in soapy water, scrub the surface and ports, and wipe it clean with a damp cloth.
5. Clear clogged burner ports carefully (3 minutes)
Inspect each small flame opening. If one is blocked, loosen the obstruction with a wooden toothpick, soft nylon bristle, or a short burst of low-pressure air directed away from your face. Work from the outside where possible.
Never enlarge a burner port with a drill bit, metal pin, paper clip, or needle. The size of these openings controls the fuel-and-air mixture. Changing it can produce a dangerously large, yellow, or unstable flame. Do not spray aerosol cleaners into the burner or fuel valve.
6. Clean the stove body and grate supports (5 minutes)
Wipe the frame, control area, pot supports, windscreen, and exterior with a damp, soapy cloth. Pay special attention to spilled oil near the burner and the corners of the drip area. Use a brush for stuck-on residue, then wipe away all remaining soap.
For high-pressure outdoor burners, such as a single propane burner used for seafood boils or home brewing, clean the heat shield and surrounding guard as well as the burner head. These parts collect splattered oil and can smoke heavily when reheated.
7. Dry everything completely (at least 15 minutes)
Dry each part with a clean towel, then leave the stove disassembled until all moisture has evaporated. Water trapped in burner ports can cause sputtering, delayed ignition, or an uneven flame. Do not speed drying with a hair dryer, heat gun, open flame, or by lighting the stove.
8. Reassemble and perform a safety check (5 minutes)
Replace the drip tray, burner cap, grate, and windscreen in their original positions. Confirm that the burner sits level and that no port is covered by a misaligned cap or support. Reconnect the fuel only after the stove is dry and fully assembled.
Before lighting, apply commercial leak-detection solution or a small amount of soapy water to the fuel connection. Open the fuel valve slowly without igniting the stove. If bubbles continue to form, close the valve immediately, disconnect the fuel, and do not use the stove until the connection is repaired or replaced.
Once the connection passes inspection, light the stove according to the manual. A healthy flame is generally steady and mostly blue, though some outdoor burners may show small yellow tips. Shut it off if you see large yellow flames, soot, popping, strong fuel odor, or flames escaping below the burner.
Mistakes to Avoid
- Cleaning while connected: Residual gas can ignite from a nearby spark or pilot light.
- Soaking the whole stove: Water can remain inside the regulator, valve, igniter, and burner passages.
- Using metal tools in ports: Enlarged openings can change the flame pattern and create a safety hazard.
- Reassembling while damp: Moisture can cause sputtering and delayed ignition.
- Ignoring the air intake: Spider webs, insects, and dirt around the mixing tube can restrict airflow.
- Testing indoors: Fuel-burning camping stoves produce carbon monoxide and should be used only outdoors, away from doors, windows, and vents.
- Spraying cleaner into the valve: Liquid or residue may damage seals and interfere with fuel flow.
How Often
Wipe the grate and cooking surface after every trip, once the stove is cool. Brush loose debris from the burner after each few uses, or immediately after a boil-over or greasy spill. Give the burner a complete cleaning every 5 to 10 outings, at the start and end of the camping season, or whenever the flame becomes uneven.
Heavy-use equipment needs more frequent attention. A high-pressure burner used for frying, boiling seafood, or home brewing may need cleaning after every event. Compact dual-fuel stoves, such as a propane-or-butane model often priced around $25 to $40, benefit from a quick inspection before every trip. Larger single propane burners commonly cost about $35 to $50 and should be checked for grease around the heat shield and guard.
When to Call a Pro or Replace
Stop using the stove if you smell gas after the valve is closed, see bubbles at a connection, find a cracked hose, or notice a damaged fuel fitting. Do not try to repair a propane regulator or modify a burner port at home. Contact the manufacturer or a qualified gas-appliance technician for service.
Replacement is usually the better choice when the burner is severely rusted, warped, cracked, or repeatedly produces a yellow, lifting, or unstable flame after cleaning. Replace hoses, seals, and canisters only with parts approved for that exact fuel type and model. A low-cost stove is not worth risking a fuel leak or fire.
FAQ
Can I wash a camp stove burner in the sink?
Wash only removable parts that the manual identifies as washable. Clean a fixed burner with a damp, soapy brush instead of submerging it. Keep the regulator, valve, hose, and igniter dry.
Why is my camp stove flame yellow after cleaning?
A yellow flame can indicate blocked burner ports, a dirty air intake, incorrect assembly, low fuel pressure, or a damaged regulator. Turn the stove off, let it cool, and inspect it again. If the flame remains yellow or produces soot, stop using the stove and have it inspected.
Can I use compressed air to clean the burner?
Use only a brief, low-pressure burst after removing loose debris, and wear eye protection. Do not use high-pressure air against a regulator, fuel valve, or delicate igniter. Never use compressed air while the stove is connected to fuel.
How do I store a clean camp stove?
Store it completely dry, disconnected from the fuel source, and protected from dust and insects. Keep the stove in a ventilated storage area rather than a hot vehicle. If the grate or burner has begun to rust, address it before storage so corrosion does not spread.